How to Use a Kickboard for Swimming: A Complete Step-by-Step Guide
A practical, beginner-friendly walkthrough for using a kickboard to build leg strength, fix your kick technique, and swim with more confidence in the water.
What Is a Kickboard and Why Use One
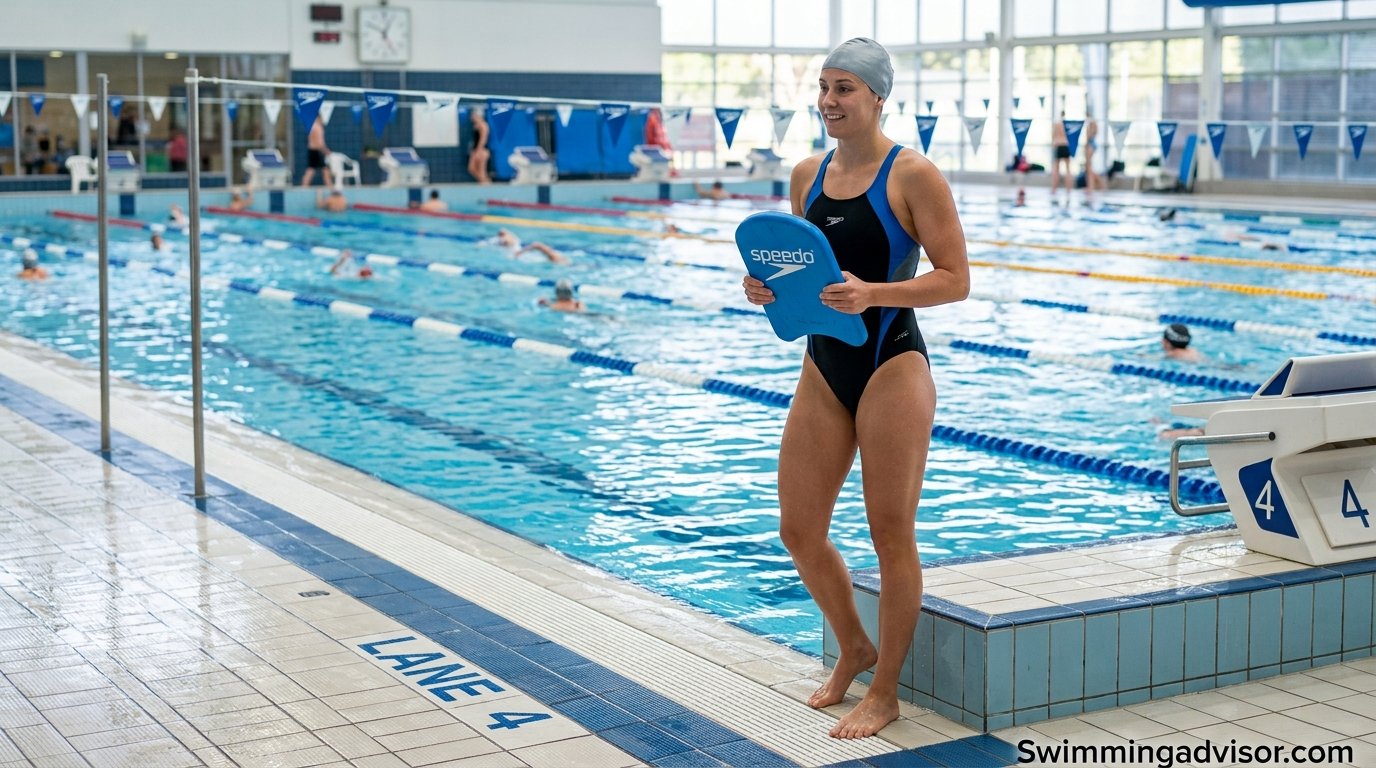
A kickboard is a buoyant foam board that swimmers hold onto with both arms while kicking with their legs. It’s one of the most common pieces of equipment found poolside, and for good reason: it isolates leg movement so you can build kick strength, fix technique flaws, and improve endurance without worrying about your arm stroke at the same time.
Whether you’re a complete beginner still getting comfortable in the water, a parent teaching a child to swim, or a competitive swimmer working on kick power for starts and turns, a kickboard gives you a stable, controlled way to isolate the lower body. Because your arms are resting on the board, all the propulsive work comes from your hips, legs, and feet — which is exactly what you want to train.
Kickboards have been a staple of swim training for decades. They are used in learn-to-swim programs, competitive swim teams, triathlon training squads, aquatic therapy clinics, and recreational lap swimming alike. The reason for this broad appeal is simple: a kickboard lets you train one component of your stroke — the kick — without the complexity of coordinating your arms and breathing at the same time. This isolation principle is similar to how a weightlifter might use a leg press machine to focus on quad strength without involving the upper body. By removing variables, you can zero in on the exact movement pattern you want to improve and make faster progress.
A kickboard is also a versatile piece of gear that adapts to many swimming styles. You can use it for flutter kick practice (freestyle and backstroke), whip kick work (breaststroke), dolphin kick drills (butterfly), or even hybrid drills that combine kicking with controlled breathing patterns. This adaptability makes it one of the most cost-effective training investments a swimmer can make.
Benefits of Kickboard Swimming
Before diving into technique, it helps to understand exactly what a kickboard does for your swimming. The benefits extend well beyond just “practicing your kick.”
1. Isolated Leg Strength Development
When you swim a full freestyle stroke, your arms contribute roughly 70 to 80 percent of your propulsion while your legs contribute 20 to 30 percent. Because the arms do so much work, the legs can get lazy — many recreational swimmers develop a weak, inefficient kick without realizing it. A kickboard removes the arms from the equation entirely, forcing your legs to generate 100 percent of the propulsive force. Over time, this dramatically increases the strength and endurance of your hip flexors, quadriceps, hamstrings, glutes, and the often-neglected muscles of the lower legs and feet.
2. Improved Kick Technique and Efficiency
Because you are not thinking about your arm stroke, catch, or pull, you can devote full mental attention to what your legs and feet are doing. This focused attention helps you notice and correct subtle flaws — a slight knee bend that is too deep, toes that are not pointed, or a kick that originates from the knee instead of the hip. Over a few weeks of regular kickboard work, most swimmers develop a noticeably smoother, more efficient kick that transfers directly to full-stroke swimming.
3. Better Body Position Awareness
Using a kickboard gives you immediate feedback about where your body sits in the water. If your hips are sinking, you will feel the drag. If your head is too high, the board will feel unstable. This real-time feedback loop teaches you to maintain a horizontal, streamlined body line — a skill that carries over to every stroke you swim.
4. Cardiovascular Conditioning Without Upper-Body Fatigue
Kickboard sets are an excellent way to build aerobic fitness when your shoulders are tired from heavy pulling sets or if you are recovering from a minor upper-body injury. Because the arms are essentially resting on the board, you can sustain high-intensity intervals that push your heart rate into training zones without accumulating additional fatigue in the shoulders, lats, or rotator cuff.
5. Ankle Flexibility and Plantar Flexion
One of the most underrated benefits of regular kickboard training is improved ankle flexibility. A proper flutter kick requires the feet to be pointed (plantar flexion), with relaxed, flexible ankles that act like fins. Swimmers who do not use a kickboard regularly often have stiff ankles that flex upward (dorsiflexion) during the kick, creating drag instead of propulsion. Regular kickboard practice, especially when paired with short-blade training fins, gradually increases ankle range of motion and teaches the feet to work as natural propulsion surfaces.
6. Core Engagement and Stability
Maintaining a flat, horizontal body position while kicking requires constant engagement of the core muscles — the rectus abdominis, obliques, and the deep stabilizers of the lumbar spine. Over time, kickboard training builds functional core strength that improves stability in all four competitive strokes and reduces the risk of lower-back strain during longer swim sessions.
7. Confidence Building for Beginners
For new swimmers, holding a kickboard provides a sense of security and buoyancy that makes it easier to relax in the water. Relaxation is the foundation of good swimming — tense, stiff swimmers waste energy and sink. A kickboard lets beginners focus on one thing at a time, building competence step by step until they are ready to let go of the board and swim independently.
8. Low-Impact Cross-Training for Land Athletes
Runners, cyclists, and other land-based athletes often use kickboard swimming as a cross-training tool because it builds leg endurance in a zero-impact environment. The water supports body weight, eliminating the joint stress that comes with running or plyometrics, while still providing meaningful resistance for the lower body. This makes kickboard sets an ideal active-recovery workout for athletes dealing with shin splints, knee irritation, or general leg soreness.
Types of Kickboards
Not all kickboards are the same. The material, shape, and size you choose will affect how the board feels in the water and how much support it provides. Understanding the different types helps you make a smarter purchase and avoids the frustration of a board that does not match your needs.
| Kickboard Type | Material | Best For | Key Characteristics |
|---|---|---|---|
| Traditional Foam Board | Closed-cell EVA foam | All-around use, beginners to advanced | Durable, inexpensive, does not absorb water, available in many sizes |
| Contoured / Ergonomic Board | High-density foam with shaped grip zones | Intermediate to advanced swimmers | Hand grooves, finger channels, and tapered edges for better hydrodynamics |
| Small / Junior Board | Lightweight EVA or PE foam | Children and small adults | Reduced buoyancy, easier for small hands to grip, less drag for lighter swimmers |
| Large / Extra-Buoyant Board | Thick closed-cell foam | Adult beginners, rehab, and therapy | Maximum buoyancy for heavy swimmers or those with limited leg strength |
| Low-Profile / Competition Board | Thin, rigid foam or composite | Competitive swimmers | Minimal drag, forces the swimmer to maintain a race-like body position |
| Hydrofoil Board | Shaped foam with a slight curve | Intermediate to advanced technique work | Curved bottom creates a slight lift effect, encouraging a higher hip position |
| Inflatable Kickboard | Vinyl or PVC with air valve | Travel, casual recreation | Lightweight, packable, but less stable and can deflate over time |
For most swimmers, a traditional closed-cell EVA foam board or a contoured ergonomic board is the best starting point. These boards are affordable, nearly indestructible, and provide a predictable level of buoyancy that works for everything from learn-to-swim drills to advanced sprint kick sets. Inflatable boards have their place for travel or casual pool days, but they lack the rigidity and stability of foam boards, which makes them less suitable for serious technique work.
The thickness of the board matters more than many swimmers realize. A thicker board provides more buoyancy, which keeps your upper body higher and makes breathing easier. This is helpful for beginners who are still building water confidence. However, a board that is too thick can push your chest and shoulders too far out of the water, causing your hips and legs to drop — the opposite of the streamlined position you want. Advanced swimmers often prefer thinner, lower-profile boards because they force the swimmer to maintain proper body alignment with less artificial support.

Want a board that won’t slip out of wet hands? A contoured foam kickboard with textured grip edges makes every drill in this guide easier to execute correctly.
Check Kickboard Prices on AmazonChoosing the Right Kickboard
Not every kickboard suits every swimmer. Size, thickness, and shape all affect how much support you get and how your body sits in the water. A board that’s too small won’t give an adult enough buoyancy, while a board that’s too large can be awkward for a child to grip.
| Swimmer Type | Recommended Board Size | Best Shape | Notes |
|---|---|---|---|
| Young child / beginner | Small / junior | Rounded edges | Easier for small hands to grip; lighter for less fatigue |
| Teen or adult beginner | Standard adult | Contoured with hand grips | Balances buoyancy with control |
| Fitness / lap swimmer | Standard to large | Flat or slightly contoured | More surface area helps with longer sets |
| Competitive swimmer | Compact / low-profile | Thin, hydrodynamic | Less drag, mimics race body position |
| Rehab / therapy use | Standard, soft foam | Extra buoyant | Reduces strain on shoulders and lower back |
| Triathlete | Compact to standard | Low-profile with grip channels | Mimics open-water body position; easy to carry in a gear bag |
| Senior swimmer | Large, extra-buoyant | Wide and flat | Maximum stability and support for reduced fatigue |
What to Look For
- Closed-cell EVA foam that resists waterlogging
- Contoured grip edges for wet-hand traction
- A size proportional to your body — not oversized
- Rounded corners for safety around other swimmers
- UV-resistant foam if you swim outdoors frequently
- A board that is thick enough to support your weight without sinking
What to Avoid
- Hard plastic boards with sharp corners
- Boards that are waterlogged or soft in the middle
- Oversized boards that force your hips too high
- Boards with no texture, which slip when hands are wet
- Extremely cheap boards that lose their shape after a few weeks of use
- Inflatable boards for serious technique training
Step 1 — The Correct Grip
Everything starts with how you hold the board. A wrong grip forces your shoulders up, which throws off your entire body position and makes kicking harder than it needs to be.
How to grip the kickboard properly
Extend both arms fully in front of you and place your hands on the top edge of the board, thumbs pointing forward and fingers relaxed over the front lip. Keep your elbows straight but not locked, and let the board rest lightly on the water’s surface rather than pressing it down.
Avoid gripping the sides of the board too far back, which tends to push your chest and shoulders upward and lift your hips down — the opposite of the flat, streamlined position you want.
Grip variations for different drills
The standard grip described above works for most kick sets, but there are several useful variations worth knowing:
- Bottom grip: Slide your hands under the board and hold the bottom edge. This lowers your shoulders closer to the water and forces you to engage your core more to maintain body position. It is a good progression for intermediate swimmers who are ready for a challenge.
- One-hand grip: Hold the board with one arm while the other arm stays at your side or performs a partial sculling motion. This simulates the asymmetry of a real stroke and helps develop balance in the water.
- Arms-over grip: Drape your forearms over the top of the board and press your elbows down, rather than gripping with your hands. This encourages a more relaxed upper body and can be useful for swimmers who tend to tense their shoulders during kick sets.
- Side grip: Hold the board at one end and kick on your side. This is an advanced variation that trains rotation and balance while still providing the buoyancy support of the board.
Step 2 — Body Position in the Water
How to set your body position
Once your grip is set, focus on keeping your body as flat and horizontal as possible, like a surfboard lying on top of the water. Your head should stay in a neutral position, eyes looking down and slightly forward, with just enough of your face out of the water to breathe comfortably.
A common error is lifting the head too high to breathe, which drops the hips and legs, creating drag. Keep the crown of your head low and let your kick — not your head lift — carry you forward.
Body position checkpoints
Use these mental checkpoints every time you start a kickboard set:
- Ears at the surface: The water line should be roughly at or just below your ear level. If the water is at your chin, your head is too low; if the water is at your shoulders, your head is too high.
- Core engaged: Imagine someone is about to lightly tap your stomach — tighten your abdominals just enough to brace for that tap. This subtle engagement keeps your hips from sagging.
- Hips near the surface: Your hip bones should be no more than a few inches below the surface. If you can feel your hips dragging significantly, your head is likely too high or your core is disengaged.
- Toes visible: During a flutter kick, your toes should just barely break the surface of the water on the upkick. If you cannot see any toe splashes, your legs are too deep.
- Board flat: The kickboard should sit flat on the water, not angled upward at the front. If the front edge is tilted up, you are pushing down on the board, which lifts your upper body but drops your lower body.

Pairing your kickboard with a pair of short-blade training fins builds ankle flexibility and kick power faster, especially for beginners still developing feel for the water.
Shop Training Fins on AmazonStep 3 — The Flutter Kick
How to perform the flutter kick with a kickboard
The flutter kick is the small, rapid, alternating kick used in freestyle and backstroke. Keep your legs long and mostly straight, with a slight bend at the knee, and let the kick originate from your hips rather than your knees.
Point your toes and keep your ankles loose so each kick creates a small propeller-like whip. Splash should stay minimal and close to the surface — a large splash usually means you’re kicking from the knee instead of the hip.
Kick tempo and rhythm
Practice a steady six-beat kick (six kicks per full arm cycle in full-stroke swimming) even while drilling with the board alone, since it builds the muscle memory and cardio rhythm you’ll rely on later.
Flutter kick amplitude
The ideal kick amplitude — how far your feet move up and down — is roughly 12 to 18 inches (30 to 45 centimeters) total for most adult swimmers. Kicks that are too narrow do not generate enough propulsion, while kicks that are too wide waste energy and create drag. A helpful visual cue: imagine your feet are kicking inside a narrow, vertical tunnel. They move up and down within that tunnel but never hit the walls.
If you are unsure about your kick amplitude, have a friend watch from the pool deck or use an underwater camera (even a phone in a waterproof case). You may be surprised at how much — or how little — your feet actually move compared to what it feels like in the water.
Step 4 — Breathing While Kicking
How to breathe during kickboard drills
Because your face is often above water while holding a kickboard, breathing feels natural — but many beginners hold their breath entirely, which raises tension in the shoulders and neck. Instead, breathe in through your mouth and exhale steadily through your nose and mouth between breaths, keeping a relaxed rhythm that matches your kick tempo.
If you’re new to swimming, start with your head fully out of the water so breathing is effortless, then gradually practice lowering your chin as your comfort with the kick improves.
Progressive breathing drills
Once basic breathing feels comfortable, try these progressive challenges to build breathing control under different conditions:
- Every-3-kicks exhale: Keep your head up but turn to one side every three kicks to exhale into the water, then turn back to breathe in. This mimics the bilateral breathing pattern of freestyle.
- Head-down kicking: Lower your face into the water and only lift to breathe every four to six kicks. This forces you to coordinate breath-holding with kick rhythm and is excellent preparation for full-stroke swimming.
- Side-kick breathing: Roll onto your side while holding the board with the bottom hand, and practice breathing with your face turned to the side. This trains the body rotation and head-turn mechanics used in freestyle breathing.
Step 5 — Breaststroke Kick with a Kickboard
How to practice the whip kick
Holding the board out in front, draw your heels up toward your glasses while keeping your knees roughly hip-width apart, then rotate your feet outward before sweeping them back and together in a circular whipping motion.
Finish each kick cycle with a brief glide, legs together and fully extended, before starting the next cycle — this pause is where much of breaststroke’s speed comes from.
Common breaststroke kick mistakes on a kickboard
- Scissor kick: Some swimmers bring the knees together and extend the legs backward like a scissor, rather than drawing the heels up and whipping outward. This creates very little propulsion and can strain the knees. Focus on the circular, outward sweep motion.
- Knees too wide: While the feet need to sweep outward, the knees should stay roughly hip-width apart throughout the kick. Wide knees reduce the whip effect and create unnecessary drag.
- No glide phase: Rushing from one kick to the next eliminates the glide, which is the fastest phase of the breaststroke cycle. After each kick, hold the streamlined position for a full second before initiating the next kick.
- Ankles not flexed outward: The breaststroke kick requires dorsiflexion and outward rotation of the ankles. If your ankles are stiff, the kick will feel powerless. Stretching the ankles before pool sessions and practicing the kick slowly helps build the necessary flexibility over time.
Step 6 — Dolphin Kick with a Kickboard
How to practice the dolphin kick
The dolphin kick — used in butterfly and underwater phases — is a powerful, undulating movement driven by the hips and core. Holding the kickboard with arms extended, initiate a wave-like motion that starts at your chest, travels through your hips, and finishes with a whip-like snap of the legs and feet together.
Unlike the flutter kick, where the legs alternate, the dolphin kick moves both legs simultaneously as a single unit. Think of your body as a whip: the handle is your chest and core, the flexible middle is your hips, and the tip that cracks is your feet. The power comes from the amplitude of the wave traveling through your body, not just from the knee bend.
Dolphin kick technique tips
- Initiate from the chest: A slight press of the chest downward starts the undulation. Avoid starting the kick from the knees, which produces a stiff, ineffective motion.
- Hips drive the power: The largest amplitude of the undulation should be at the hips. Your hips should move several inches up and down with each cycle.
- Snap the feet: The final acceleration comes from a quick snap of the ankles and feet together, similar to how a dolphin’s tail flukes generate thrust.
- Keep the kick compact: While the undulation should be visible, avoid excessive body movement that creates drag. The goal is to channel the wave into propulsion, not into big vertical displacement of the whole body.
- Breathe to the side or forward: Unlike full butterfly, where you breathe forward, kickboard dolphin kick practice allows you to turn your head to the side or simply lift it forward between kick bursts, since the board provides stability.
Dolphin kick drill progressions
- Standing dolphin on deck: Before entering the water, stand on the pool deck and practice the undulating motion — slight chest press, hip thrust, knee bend, ankle snap — to build the motor pattern on land.
- Vertical dolphin kick: In deep water, without the board, tread in place using only dolphin kicks with your arms crossed over your chest. This isolates the kick and builds core strength.
- Board dolphin kick: Use the kickboard to practice the full dolphin kick horizontally, focusing on a smooth wave from chest to toes.
- Underwater dolphin kick off the wall: After pushing off the wall in a streamlined position, perform three to five strong dolphin kicks before surfacing. Combine this with board kicking for a complete dolphin kick workout.
Step 7 — Push-Off and Streamline Entry
How to push off the wall into kickboard drills
Start each length by placing both feet flat against the wall below the surface, knees bent, kickboard held out in front with arms extended. Push off firmly, keeping your body in a tight, streamlined line before you begin kicking.
Let the glide slow naturally before you begin kicking — starting to kick too early wastes the free speed you get from a strong push-off.
Streamline tips with a kickboard
A strong streamline with a kickboard requires a few adjustments compared to a normal streamline:
- Squeeze the board tightly against the front of your body with both hands to create a narrow profile.
- Tuck your chin slightly and press your biceps against your ears.
- Keep your core tight and legs together, toes pointed.
- Hold the glide for two to three seconds or until you feel your speed drop noticeably, then begin your kick.
This push-off-and-glide practice also reinforces the habit of streamlining off every wall during full-stroke swimming — one of the easiest ways to shave time off your laps without any extra effort.

Clear, fog-free vision makes it much easier to check your body position and streamline during every kickboard set.
Browse Swim Goggles on AmazonKickboard Drills for Every Level
Once the fundamentals feel natural, structured drills help you progress faster than aimless laps. Below are drills organized by skill level.
Beginner Drills
- Wall Kick Holds: Hold the wall’s edge (not the board) and practice flutter kicking in place for 20–30 seconds to build comfort with the motion.
- Short Board Lengths: Kick one width or short length of the pool with the board, resting as needed between attempts.
- Head-Up Kicking: Keep your head above water the entire time to focus purely on leg mechanics without worrying about breathing.
- Glide-and-Kick: Push off the wall, glide for three seconds, then begin a slow, controlled flutter kick. Focus on maintaining body position throughout.
- Board Between Legs: Place the kickboard vertically between your thighs and squeeze gently while flutter kicking. This engages the inner thigh muscles and teaches proper leg alignment.
Intermediate Drills
- Board + Fin Combo: Add fins to build ankle flexibility and kick amplitude over longer distances.
- Kick Sets with Rest Intervals: Swim 4–6 lengths of kicking with 15–20 seconds rest between each to build aerobic capacity.
- Vertical Kicking: Tread water using only a kick, hands out of the water, to build leg endurance and core stability.
- Side-Kick Drill: Hold the board with one arm and kick on your side for a full length, then switch sides. This trains balance and body rotation while still using the board for support.
- Descend Sets: Swim four 50-meter kick repeats, making each one faster than the last (the first is easy, the last is near-maximum effort). This teaches pace control and progressive effort.
Advanced Drills
- Sprint Kick Intervals: Short, fast kick bursts of 15–25 meters at near-maximum effort, followed by full recovery.
- Underwater Dolphin Kick with Board: Practice a few strong dolphin kicks underwater off each wall before surfacing into flutter kick.
- Resistance Kicking: Use a drag sock or parachute alongside the board for added resistance training.
- No-Breath Kick Sprints: Kick a full 25 meters without breathing while holding the kickboard. This builds anaerobic tolerance and mental toughness.
- Kick with Paddles: Hold small finger paddles while gripping the kickboard to add surface area to your hands for extra resistance and a different proprioceptive feel.
- Broken Kick Sets: Swim a total of 200 meters in kick, broken into segments of 50 meters with only 5 to 10 seconds of rest between each. This simulates the fatigue of a continuous 200-meter kick while allowing just enough recovery to maintain good technique.
| Drill | Level | Focus | Suggested Volume |
|---|---|---|---|
| Wall Kick Holds | Beginner | Comfort & rhythm | 3 x 20-30 sec |
| Short Board Lengths | Beginner | Basic endurance | 4-6 widths |
| Glide-and-Kick | Beginner | Body position | 6 x 15m |
| Board + Fin Combo | Intermediate | Ankle flexibility | 4 x 25m |
| Vertical Kicking | Intermediate | Leg endurance / core | 3 x 30-45 sec |
| Side-Kick Drill | Intermediate | Balance / rotation | 4 x 25m (2 per side) |
| Sprint Kick Intervals | Advanced | Power & speed | 6-8 x 15-25m |
| Resistance Kicking | Advanced | Strength | 4 x 25m |
| No-Breath Kick Sprints | Advanced | Anaerobic tolerance | 4 x 25m |
| Broken Kick Sets | Advanced | Race-simulation endurance | 4 x 50m (5-10 sec rest) |
Stroke-Specific Kickboard Training
While most swimmers associate kickboard work with freestyle flutter kick, a kickboard is equally valuable for training the kick of every competitive stroke. Tailoring your kickboard sets to the stroke you want to improve makes the training more specific and the carryover to full-stroke swimming more direct.
Freestyle and Backstroke: Flutter Kick Focus
Freestyle and backstroke share the same fundamental kick — the alternating flutter kick. When training this kick with a kickboard, the key technical points are a hip-driven motion, pointed toes, minimal knee bend, and a kick amplitude of about 12 to 18 inches. For backstroke-specific training, you can hold the kickboard on your chest or stomach and kick on your back, letting the board provide buoyancy while you focus on keeping your hips high and your kick compact.
A useful freestyle-specific drill is to kick with one arm extended holding the board and the other arm at your side, turning your head to breathe on the non-board side every few kicks. This simulates the breathing mechanics of freestyle while still using the board for support.
Breaststroke: Whip Kick Focus
The breaststroke kick is fundamentally different from the flutter kick and requires its own dedicated practice. With a kickboard, focus on the three-phase whip kick: draw the heels up toward your glutes with knees hip-width apart, rotate the feet outward so the soles face backward, and sweep the feet outward and back in a circular whipping motion before squeezing the legs together into a glide.
Many breaststroke swimmers benefit from practicing the kick slowly and deliberately with a board, exaggerating the foot rotation and the glide phase. Speed comes later; correct mechanics come first. Aim for a two-second glide after each kick to reinforce the habit of streamlining between kicks.
Butterfly: Dolphin Kick Focus
Butterfly’s dolphin kick is perhaps the most challenging kick to practice with a kickboard because of the undulating body motion involved. To train it effectively, hold the board with both arms extended and initiate the kick from your chest, letting a wave travel through your hips and snap out through your feet. The key is to keep the undulation smooth and rhythmic rather than jerky and exaggerated.
A helpful drill is the “two-kick butterfly” pattern: perform two dolphin kicks per glide, with a brief breath to the side between sets of kicks. This builds the double-kick rhythm that competitive butterfly swimmers use, where the first kick occurs during the hand entry and the second during the hand exit.
Backstroke: Kick on Your Back
To practice backstroke kick with a kickboard, flip onto your back and hold the board flat on your chest or stomach. Your ears should be in the water, your face above the surface, and your hips high. Flutter kick from the hips with small, fast motions. This position closely mimics the body alignment of backstroke and gives you the buoyancy support to focus entirely on leg technique. The main challenge is maintaining a high hip position — if your hips drop, the board on your chest will tilt and you will feel the drag immediately.
Muscles Worked During Kickboard Swimming
Understanding which muscles are doing the work helps you train more intentionally and recognize when imbalances or weaknesses might be limiting your kick performance.
| Muscle Group | Role in Kicking | Kick Type | How to Target It |
|---|---|---|---|
| Hip flexors (iliopsoas) | Lift the leg during the upkick phase | Flutter kick | Focus on a strong upkick; practice vertical kicking |
| Quadriceps | Extend the knee during the downkick | Flutter kick, dolphin kick | Sprint kick sets; resistance kicking with drag gear |
| Hamstrings | Bend the knee during the recovery phase | Flutter kick, dolphin kick | Slow, controlled flutter kicks emphasizing the knee bend |
| Glutes (maximus, medius) | Stabilize the hip and drive the downkick | All kick types | Long kick sets; side-kick drills |
| Calves (gastrocnemius, soleus) | Plantar flex the ankle for propulsion | All kick types | Pointed-toe practice; fin kicking |
| Tibialis anterior | Dorsiflex the ankle for breaststroke foot rotation | Breaststroke whip kick | Dedicated breaststroke kick sets |
| Inner thigh (adductors) | Squeeze legs together at the end of each kick | Breaststroke, dolphin kick | Board-between-legs drill; dolphin kick sets |
| Outer thigh (abductors) | Control leg spread during breaststroke recovery | Breaststroke whip kick | Slow-motion breaststroke kick focusing on control |
| Rectus abdominis | Stabilize the trunk and initiate dolphin undulation | Dolphin kick, all kicks for stability | Underwater dolphin kick; no-board vertical kick |
| Lower back (erector spinae) | Maintain body alignment and prevent hip drop | All kick types | Long, sustained kick sets where fatigue challenges posture |
A balanced kickboard training program works all of these muscle groups over time. If you only practice flutter kick, for example, you will develop strong hip flexors and quadriceps but may neglect the adductors and tibialis anterior muscles used in breaststroke. Including a variety of kick types in your kickboard routine ensures balanced lower-body development and reduces the risk of overuse injuries caused by repetitive motion in a single plane.
For swimmers who experience knee pain during kickboard work, the most common cause is an exaggerated knee bend during flutter kick or an incorrect whip kick motion in breaststroke. Keeping the kick compact and hip-driven reduces strain on the knee joint. If pain persists, consult a sports medicine professional or a swim coach who can assess your kick mechanics underwater.
Kickboard Workouts for Fitness and Weight Loss
Kickboard swimming is an excellent form of cardiovascular exercise that can contribute meaningfully to weight management and overall fitness goals. Because kicking is metabolically demanding — the large muscles of the legs require significant oxygen and energy — kickboard sets elevate the heart rate quickly and burn a substantial number of calories per minute.
Estimated calorie burn during kickboard swimming
The exact number of calories burned depends on your body weight, kick intensity, and session duration, but as a general guideline, a 155-pound (70 kg) adult swimming kick laps at moderate effort will burn approximately 350 to 500 calories per hour. At higher intensities — such as sprint kick intervals — calorie expenditure can exceed 600 calories per hour. This is comparable to running at a moderate pace, but with the added benefit of zero impact on the joints.
Sample kickboard fitness workout (45 minutes)
This workout is designed for intermediate swimmers who want to use kickboard training as a primary fitness session:
- Warm-up: 200 meters easy freestyle swim (no board) + 100 meters easy kick with board
- Build set: 4 x 50 meters flutter kick with board, starting easy and building to moderate effort. Rest 15 seconds between each.
- Main set: 8 x 25 meters kick at high effort with 20 seconds rest. Alternate between flutter kick (odds) and dolphin kick (evens).
- Endurance set: 2 x 200 meters continuous kick with board at a steady, moderate effort. Rest 30 seconds between each.
- Sprint finish: 4 x 15 meters maximum-effort kick sprints with full recovery (30 seconds or more between each).
- Cool-down: 100 meters easy backstroke kick with board + 100 meters easy freestyle swim.
Total kick distance: approximately 1,200 meters. Total session time: approximately 40 to 45 minutes including rest. This workout provides a combination of aerobic base building, anaerobic power development, and sustained endurance work that makes it an effective standalone fitness session.
Tips for weight loss with kickboard training
- Consistency matters more than intensity: Three to four moderate kickboard sessions per week will produce better long-term results than one brutal session followed by days of soreness and avoidance.
- Combine with full-stroke swimming: Use kickboard sets as one component of a larger swim workout that also includes pulling and full-stroke intervals. This ensures balanced fitness and prevents overuse of the legs.
- Monitor your effort: If you can hold a conversation during your kick sets, the intensity is probably too low for meaningful calorie burn. Aim for a level where breathing is elevated and you need to focus, but you can still maintain good technique.
- Progress gradually: Increase total kick distance or intensity by no more than 10 percent per week to avoid injury and allow your muscles to adapt.
Kickboard Swimming for Kids
Kickboards are one of the most effective teaching tools for children learning to swim. The buoyancy and stability they provide give young swimmers confidence while allowing instructors and parents to focus on teaching one skill at a time. However, using a kickboard with children requires some specific considerations to ensure safety and effectiveness.
Choosing the right board for children
Children need smaller, lighter boards than adults. A standard adult kickboard can be too large for a child to grip comfortably and may push their upper body too far out of the water, causing the legs to sink. Look for junior-sized boards designed specifically for children aged roughly 4 to 10. These boards are narrower, shorter, and provide less buoyancy — just enough for a child’s lighter body weight.
The board should have rounded edges and a soft foam construction with no hard plastic parts. Children tend to grip boards more tightly than adults, so contoured grip edges are helpful but not essential — a simple rectangular foam board works well for most young learners.
Kickboard drills for young children
- Star-kick hold: Have the child lie on top of the kickboard face-down, hugging it like a pillow, while kicking across a short distance. This is the most natural position for young children and requires the least coordination.
- Parent-assisted kicking: The child holds the kickboard while the parent walks alongside or gently supports the child’s torso. This provides physical reassurance while allowing the child to practice the kick motion.
- Kick-and-reach: Place floating toys or rings at intervals across the pool. The child kicks with the board to reach each toy, turning the drill into a game that builds endurance without feeling like work.
- Bubble-kick: Encourage the child to put their face in the water and blow bubbles while kicking with the board. This combines kick practice with breath control, which is one of the most important foundations for independent swimming.
- Kick races: If multiple children are in the class, set up short kickboard races across the width of the pool. Competition — even playful competition — is a powerful motivator for kids and naturally increases effort.
Safety considerations for children using kickboards
- A kickboard is a training tool, not a life-saving device. Never rely on a kickboard to keep a non-swimming child safe in the water. Active adult supervision within arm’s reach is always required.
- Teach children to hold the board firmly but not to climb on top of it or stand on it, which can cause the board to slip out and leave the child unexpectedly unsupported.
- Use kickboards only in water depth appropriate for the child’s swimming ability. In deep water, a child who loses grip on the board may panic.
- Inspect the kickboard regularly for cracks, tears, or waterlogging that could reduce its buoyancy.
Kickboard for Seniors and Rehabilitation
Kickboard swimming offers particular benefits for older adults and individuals recovering from injuries or surgeries. The water’s buoyancy supports the body weight, reducing stress on joints and the spine, while the resistance of the water provides a gentle but effective strength and cardiovascular workout.
Benefits for seniors
- Joint-friendly exercise: Water supports up to 90 percent of body weight when submerged to the chest, making kickboard kicking possible for people with arthritis, hip replacements, or knee issues who cannot tolerate land-based exercise.
- Improved balance and coordination: Maintaining a horizontal position while kicking requires constant micro-adjustments of the core and hip muscles, which builds proprioception and functional balance — key factors in fall prevention for older adults.
- Cardiovascular health: Regular moderate-intensity kickboard sessions help maintain heart health, lower blood pressure, and improve circulation without the jarring impact of walking or jogging.
- Independence and confidence: For seniors who are returning to physical activity after a period of independence, a kickboard provides a sense of security that makes it easier to start moving again in the water.
Rehabilitation applications
Physical therapists frequently prescribe kickboard exercises for patients recovering from:
- Knee surgery (ACL, meniscus, total knee replacement): Gentle flutter kicking restores range of motion and builds quadriceps strength without the full weight-bearing stress of land exercise.
- Hip replacement: Kickboard work rebuilds hip flexor and glute strength while maintaining a safe range of motion during recovery.
- Lower back pain: The horizontal position and water support decompress the spine, while gentle kicking strengthens the core and lower back muscles that stabilize the lumbar region.
- Ankle and foot injuries: Slow, controlled flutter kicks with a kickboard promote circulation and gentle range of motion in the ankle and foot, accelerating healing.
- Shoulder injuries: Because the arms are resting on the kickboard rather than performing overhead movements, kickboard sets allow continued cardiovascular training while the shoulder heals.
If you are using a kickboard for rehabilitation, work with a qualified physical therapist or aquatic exercise specialist who can design a program tailored to your specific injury and recovery stage. Start with very short distances and low intensity, and increase gradually based on comfort and medical guidance.
Kickboard Training for Competitive Swimmers
At the competitive level, kickboard training takes on a different character than it does for beginners or fitness swimmers. The focus shifts from basic technique to maximizing kick power, speed, and race-specific endurance. Here is how competitive swimmers and coaches use kickboards as part of a structured training program.
Kick power for starts and turns
In competitive swimming, the underwater phase after each start and turn is one of the most important determinants of race time. A powerful dolphin kick off the wall can be worth several tenths of a second per turn — which adds up over the course of a 200-meter or longer race. Kickboard training builds the leg strength and anaerobic capacity needed for these explosive underwater phases.
A common set for developing kick power is 8 to 12 repetitions of 25-meter sprint kicks with a board, holding maximum effort for each rep and taking full recovery (30 to 60 seconds) between each. The focus is on quality — every kick should be as fast and powerful as possible — rather than accumulating fatigue.
Race-pace kick sets
For swimmers preparing for specific events, kickboard sets can simulate the kick demands of the race. For example, a swimmer targeting the 100-meter freestyle might perform a set of 4 x 100 meters kick at the same effort level and rest interval as their race plan, training their legs to sustain the required kick tempo and power for the full race distance.
Kick count and efficiency tracking
Competitive swimmers often count their kicks per length during kickboard sets to track efficiency. A lower kick count per 25 meters generally indicates a longer, more efficient kick. Tracking this number over weeks and months provides objective evidence of improvement. An advanced swimmer might average 10 to 12 flutter kicks per 25-meter length, while a developing swimmer might need 16 to 20.
Kick-to-swim comparison testing
Coaches sometimes use timed kick sets to compare a swimmer’s kick speed to their full-stroke speed. If a swimmer’s kick-only time for 50 meters is much slower relative to their full-stroke time, it indicates that the kick is a weakness that needs more attention. Conversely, if kick times are close to full-stroke times, the legs are strong but the arms may be the limiting factor. This data helps coaches design targeted training plans.
Kickboard Training for Triathletes
Triathletes often view swimming as the weakest link in their race, and many struggle with the kick in particular. Because the swim leg of a triathlon is typically done in open water with a wetsuit that provides buoyancy, the kick serves primarily as a stabilization mechanism rather than a primary propulsive force. However, a strong kick still matters for body positioning, draft positioning, and the final approach to the swim exit.
Why triathletes should use a kickboard
- Body position training: A kickboard teaches triathletes to maintain a flat, horizontal body line, which reduces drag and conserves energy — critical when the swim is followed by a bike and run.
- Kick endurance for the final 100 meters: Many triathletes kick very lightly during the swim to save their legs for the bike. However, a strong kick in the final 100 meters of the swim helps lift the body higher, increase stroke rate, and arrive at the swim exit with momentum. Kickboard training builds the reserve capacity for this finishing kick.
- Two-beat kick development: Most efficient triathletes use a two-beat kick (two kicks per arm cycle) rather than a six-beat kick. Kickboard drills help develop the timing and coordination of this slower, more efficient kick pattern.
- Sighting practice: Kickboard sets with the head up (looking forward, as in open-water sighting) build the neck and upper-back endurance needed for sighting buoys during a race without disrupting stroke rhythm.
Sample triathlete kickboard session
- Warm-up: 200m easy swim + 100m easy kick with board
- Set 1: 6 x 50m kick with board, head up for the first 15 meters of each 50. Rest 15 seconds.
- Set 2: 4 x 100m kick with board at a steady two-beat kick pace. Rest 20 seconds.
- Set 3: 4 x 25m sprint kick with board to simulate the final approach to the swim exit. Full recovery.
- Cool-down: 100m easy swim.
Using a Kickboard in Open Water
While kickboards are primarily a pool training tool, they can also be used in open water settings such as lakes, calm bays, or protected beach areas — with important safety precautions.
When to use a kickboard in open water
- Practice sessions in calm conditions: A kickboard provides stability for beginners who want to build confidence in open water before swimming without support.
- Guided open-water swim clinics: Instructors often use kickboards as a teaching tool during group open-water sessions, allowing participants to focus on sighting, breathing, and body position without the complexity of full-stroke swimming in unfamiliar conditions.
- Recovery swims: After a hard open-water swim or race, an easy kickboard recovery set in shallow, calm water helps flush the legs and maintain movement without intensity.
Open-water kickboard safety
- Always swim with a buddy or in a supervised area: Open-water environments are inherently less predictable than pools. Never use a kickboard alone in open water.
- Use a brightly colored board: In open water, visibility is critical for safety. Choose a kickboard in a bright color such as yellow, orange, or pink so that boats, jet skis, and other watercraft can see you easily.
- Be aware of currents and waves: A kickboard can act as a sail in windy conditions, pushing you off course. In choppy water, the board may bounce and make it harder to maintain a steady kick. Start in calm, protected areas before progressing to more challenging conditions.
- Wear a bright swim cap and consider a safety buoy: In addition to a brightly colored kickboard, wearing a visible swim cap and towing a safety buoy increases your visibility and provides an emergency flotation device if needed.
How to Use a Kickboard in Deep Water
Many beginners feel anxious about using a kickboard in the deep end of the pool where they cannot touch the bottom. This anxiety is normal and easily addressed with a gradual approach.
Building confidence in deep water
Start by practicing kickboard drills in water where you can comfortably stand. As your kick improves and your comfort level rises, gradually move to deeper water. The key insight is that a kickboard provides the same buoyancy support regardless of water depth — if you can kick across a shallow section, you can kick across a deep section with the same effort. The only difference is psychological, not physical.
A helpful transition exercise is to kick halfway across the pool in the shallow end, then turn around and kick back. Once that feels easy, move to a lane that includes both shallow and deep sections, and kick the full length. Over a few sessions, the deep water will feel no different from the shallow water.
Tips for deep-water kickboard work
- Maintain continuous kicking: In deep water, stopping your kick means you will start to sink slightly. Keep a steady, even kick tempo to maintain your position at the surface.
- Stay in a lane or near the wall: If you need to rest, swim to the nearest wall or lane rope rather than trying to tread water in the middle of the deep end.
- Use a thicker board if you are anxious: A larger, more buoyant kickboard provides more support and can ease the transition to deep-water kicking. Once your confidence builds, you can switch to a smaller board.
- Practice the “board push” safety skill: If you ever need to abandon your kickboard in deep water, push it away from you, take a breath, and swim to the nearest wall using a simple, relaxed stroke. Knowing this skill exists reduces anxiety even if you never need to use it.
Warm-Up and Cool-Down Routines for Kickboard Sessions
A proper warm-up before kickboard work and a cool-down afterward reduce the risk of muscle cramps, improve performance during the main set, and accelerate recovery. Many swimmers skip these phases, but they make a noticeable difference over time.
Pre-kickboard warm-up (10 minutes)
- Light full-stroke swimming (5 minutes): Swim 200 to 300 meters at an easy, relaxed pace. Focus on smooth strokes and steady breathing to raise your heart rate gradually and warm up the shoulder and core muscles.
- Dry-land ankle and hip mobility (3 minutes): Sit on the pool deck and circle your ankles in both directions (10 circles each, each foot). Then stand and perform 10 leg swings per leg, forward and back, to loosen the hip flexors and hamstrings.
- Easy kick with board (2 minutes): Swim two easy 25-meter kick lengths with the kickboard at a relaxed pace. Focus on getting a feel for the water and the kick motion before increasing intensity.
Post-kickboard cool-down (10 minutes)
- Easy kick with board (3 minutes): Swim 100 meters of easy, relaxed kick with the board. This flushes metabolic waste from the leg muscles and helps the body transition from high-intensity work to rest.
- Easy backstroke or freestyle (4 minutes): Swim 150 to 200 meters at a very easy pace without the kickboard, using a relaxed stroke to bring the heart rate down and restore normal breathing.
- Static stretching on deck (3 minutes): Stretch the hip flexors (lunge stretch), quadriceps (standing quad stretch), hamstrings (seated toe touch), and calves (wall calf stretch). Hold each stretch for 20 to 30 seconds. This reduces post-exercise muscle tightness and improves long-term flexibility.
Hydration and nutrition notes
Swimmers often underestimate fluid loss during pool sessions because they do not feel sweat in the water. Kickboard sets, especially high-intensity intervals, produce significant sweat and metabolic water loss. Drink water before, during breaks in, and after your kickboard session. If your session exceeds 60 minutes, consider a sports drink with electrolytes to replace sodium and potassium lost through sweat.
For pre-swim nutrition, eat a light meal or snack containing carbohydrates and moderate protein about 60 to 90 minutes before your session. Avoid heavy, high-fat meals that sit in the stomach and cause discomfort during kicking. Good options include a banana with peanut butter, a small bowl of oatmeal, or a granola bar.
Common Mistakes and How to Fix Them
Common Mistakes
- Kicking from the knees instead of the hips
- Gripping the board too tightly, tensing the shoulders
- Lifting the head too high to breathe
- Letting the hips and legs sink below the surface
- Pointing toes downward instead of relaxed and back
- Holding the breath instead of exhaling steadily
- Using an oversized board that pushes the chest too high
- Kicking with stiff, locked ankles
- Looking straight ahead instead of down and slightly forward
- Starting to kick immediately off the wall instead of gliding first
- Only practicing one kick type (e.g., always flutter kick)
- Skipping warm-up and cool-down
Quick Fixes
- Focus on hip-driven kicks; imagine kicking from the top of your thigh
- Loosen your grip and let your shoulders relax
- Keep your chin low, eyes toward the bottom of the pool
- Engage your core to keep hips near the surface
- Point toes back and keep ankles loose, not stiff
- Exhale steadily through nose and mouth between breaths
- Choose a board proportional to your body size
- Practice ankle circles on deck before each session
- Look down at a 45-degree angle, not straight forward
- Count to three after pushing off before starting your kick
- Include flutter, dolphin, and whip kick drills in each session
- Always do a 10-minute warm-up and 10-minute cool-down
4-Week Kickboard Training Plan
This plan is designed for beginner-to-intermediate swimmers who want to build kick strength, improve technique, and increase endurance over four weeks of consistent practice. Each week includes three sessions of approximately 30 to 40 minutes each, with one rest day between sessions.
| Week | Focus | Sample Set | Total Kick Distance |
|---|---|---|---|
| Week 1 | Comfort and body position | 4 x 25m easy kick, generous rest (30+ sec). Focus on flat body, relaxed grip, breathing rhythm. | 200–300m per session |
| Week 2 | Kick rhythm and breathing | 6 x 25m kick with breathing focus (head-up for 12.5m, head-down for 12.5m). 20 sec rest between repeats. | 300–500m per session |
| Week 3 | Endurance | 8 x 25m kick, 15 sec rest. Add a continuous 100m kick at moderate effort. Include one set of dolphin kick or breaststroke kick. | 500–700m per session |
| Week 4 | Speed and power | 6 x 25m fast kick, full recovery (30+ sec). Add 4 x 50m moderate kick with 15 sec rest. Finish with 4 x 15m sprint kick at maximum effort. | 600–900m per session |
After completing this four-week plan, assess your progress: Can you kick farther without stopping? Is your body position flatter? Do your legs feel stronger? Use these answers to design your next four-week cycle, increasing total distance by 10 to 15 percent and introducing more advanced drills.
Week-by-week progression tips
- Week 1: Do not worry about speed or distance. The goal is to feel comfortable with the kickboard, establish a consistent breathing pattern, and begin developing the hip-driven kick motion. If you need to stop and rest every 25 meters, that is perfectly fine.
- Week 2: Begin to extend your continuous kick distance. Try to kick 50 meters without stopping at least once during each session. Introduce the head-down breathing drill to practice exhaling underwater.
- Week 3: Increase total volume by adding more repeats and one longer continuous set. Start mixing in dolphin kick or breaststroke kick to develop versatility. If you have fins, use them for one set per session to build ankle flexibility.
- Week 4: Shift emphasis toward speed and power. The sprint kick sets should feel hard — near maximum effort for short bursts. The longer moderate sets build the endurance base. This combination of speed and endurance creates well-rounded kick fitness.
Kickboard Alternatives and Add-Ons
A kickboard isn’t the only tool for kick training, and combining it with other gear often accelerates progress.
- Pull buoy: The opposite tool — isolates the arms instead of the legs. Use it on pulling sets to complement your kickboard work and build balanced swim fitness.
- Fins: Increase propulsion and ankle flexibility during kick sets. Short-blade training fins are preferred over long scuba-style fins because they mimic the natural flutter kick motion more closely.
- Drag socks or parachutes: Add resistance for strength-focused kicking. A drag sock worn over one or both feet creates significant water resistance that builds explosive kick power.
- Wall or pool edge: A free, always-available substitute for short kick holds. Hold the wall with both hands and practice flutter or dolphin kicking in place.
- Zoomers or short fins: A hybrid between fins and bare feet, these provide a small amount of extra propulsion while still requiring good ankle flexibility and kick technique.
- Snorkel: A front-mount swim snorkel allows you to breathe continuously without turning your head, which lets you focus entirely on body position and kick mechanics while using the kickboard.
- Kick wedges or alignment kickboards: Specialty boards with a wedge shape that forces the swimmer into a higher hip position. These are useful for advanced technique work but are not necessary for most swimmers.
Safety Tips for Kickboard Practice
- Never use a kickboard as a substitute for proper flotation supervision with non-swimmers or young children.
- Keep an eye on lane etiquette — kickboards create wide arm spans that can bump nearby swimmers.
- Rinse and dry your board after each use to prevent mildew and extend its lifespan.
- Stop and rest if you feel lower back strain, which often signals your hips are sinking too low.
- Do not use a kickboard that is cracked, waterlogged, or losing pieces of foam, as it may not provide adequate buoyancy.
- If you experience knee pain during kickboard work, reduce your kick amplitude and ensure you are kicking from the hips, not the knees. Persistent pain should be evaluated by a sports medicine professional.
- Swim in designated areas with lifeguard supervision whenever possible, especially if you are a beginner or are practicing in unfamiliar water.
- Do not use a kickboard in water deeper than your comfort level until you are confident in your ability to maintain the board and swim to safety independently.
- If you share a lane, communicate with other swimmers before starting your kickboard set. Kick sets take up more of the lane than regular swimming due to the extended arm position.
- Apply waterproof sunscreen if you are swimming outdoors. Kickboard sets often keep your back and shoulders exposed to the sun for extended periods.
Frequently Asked Questions
Do I need a kickboard to learn to swim?
No, but it makes early kick practice much easier by removing the need to balance arm movement while you build leg strength and comfort in the water. Many learn-to-swim programs introduce kickboards in the first few lessons because they provide buoyancy support and allow the instructor to focus on one skill at a time. Once basic kick technique is established with a kickboard, swimmers can gradually transition to kicking without a board and eventually to full-stroke swimming.
What size kickboard should I buy?
Choose a size proportional to your body — smaller for children, standard for most teens and adults, and compact low-profile boards for competitive swimmers. If you are an adult beginner who wants maximum buoyancy support, a large or extra-buoyant board is appropriate. If you are an experienced swimmer using the board for technique work, a standard or compact board will be more effective because it forces you to maintain better body position with less artificial support.
Can a kickboard help with breaststroke as well as freestyle?
Yes, kickboards work well for isolating both the flutter kick used in freestyle and backstroke and the whip kick used in breaststroke. For breaststroke kick practice, hold the board in the standard grip and focus on drawing the heels up, rotating the feet outward, and whipping the legs back together in a circular motion. The board provides the buoyancy needed to maintain a horizontal position while you concentrate on the complex mechanics of the whip kick.
Why do my hips sink when I use a kickboard?
This usually happens when the head is lifted too high or the kick originates from the knees instead of the hips; lowering your gaze and engaging your core helps correct it. Another common cause is a board that is too large — an oversized board pushes the chest and shoulders too far out of the water, which acts like a seesaw and drops the hips. Try a smaller board or grip the board further toward the front edge to reduce this effect.
Should beginners use fins with a kickboard?
Fins can help beginners feel proper ankle movement and generate more propulsion, though it’s worth practicing without them occasionally to build raw kick strength. Fins are a useful training tool, not a crutch. A good approach is to alternate: use fins for one set, then remove them for the next set so that your muscles develop the flexibility and strength to kick effectively without assistance.
How long should a kickboard session last?
Even 10-15 minutes of focused kick work two to three times a week can meaningfully improve leg strength and technique over a few weeks. For more substantial fitness and technique gains, aim for 25 to 40 minutes of kickboard work per session, including warm-up and cool-down. Competitive swimmers may spend 30 to 60 minutes on kick-focused sets within a longer practice session.
Is it normal for my legs to feel tired quickly?
Yes, kicking uses different muscles than the rest of the stroke, so early fatigue is common until your legs adapt to the new demand. Most beginners will notice significant improvement in kick endurance within two to three weeks of consistent practice. If fatigue is extreme or accompanied by cramping, make sure you are hydrated and consider shortening your kick sets until your fitness improves.
Can adults use a kickboard for fitness, not just technique?
Absolutely — kickboard sets are a popular low-impact cardio and leg-strengthening workout for swimmers of all ages. Kickboard fitness workouts can be structured with intervals, endurance sets, and sprint work in the same way as full-stroke swim workouts. Because the legs are large muscle groups, kickboard training elevates the heart rate quickly and burns a significant number of calories, making it an excellent choice for weight management and cardiovascular fitness.
What’s the difference between a kickboard and a pull buoy?
A kickboard isolates the legs while the arms rest on it; a pull buoy does the opposite, isolating the arms while it floats between the legs. Both are valuable training tools, and a well-rounded swim training program uses both. Kickboard sets build leg strength and kick technique, while pull buoy sets build arm strength, stroke mechanics, and upper-body endurance. Using only one and neglecting the other creates an imbalance that limits overall swim performance.
How do I stop my kickboard from slipping out of my hands?
Look for a board with contoured, textured grip edges, and avoid gripping too far back on the board where control is reduced. Also, try relaxing your grip slightly — a death grip on the board actually makes slipping more likely because the hand muscles fatigue faster and lose their ability to maintain a secure hold. A relaxed but firm grip with fingers wrapped over the front edge provides the best combination of control and endurance.
Can kickboards be used for water safety or rehab purposes?
Yes, many rehab and physical therapy pool programs use kickboards for low-impact leg movement that doesn’t strain the joints as much as land-based exercise. The buoyancy of the water supports body weight, reducing stress on the knees, hips, and spine while the resistance of the water provides a gentle strengthening stimulus. Kickboards are also used in water safety programs to teach children and adults basic kick technique as a foundation for learning to swim independently.
How often should I replace my kickboard?
A high-quality closed-cell EVA foam kickboard can last several years with proper care. Replace your board if it becomes waterlogged (feels heavy and soft), develops cracks or tears that expose the foam interior, or loses its buoyancy. Rinse the board with fresh water after each use, especially after saltwater or chlorinated pool sessions, and store it out of direct sunlight to prevent UV degradation of the foam.
Is kickboard swimming good for lower back pain?
For many people, gentle kickboard swimming helps relieve lower back pain by decompressing the spine in the horizontal, buoyancy-supported position and strengthening the core and lower back muscles. However, if the swimmer’s hips sink too low during kicking — which is common for beginners — the lower back can arch excessively, potentially worsening discomfort. The key is maintaining proper body position with engaged core and high hips. If you have a history of lower back problems, consult a physical therapist before starting a kickboard routine.
Can I use a kickboard to train for a swimming race?
Yes, competitive swimmers regularly incorporate kickboard sets into their training to build kick speed, power, and endurance. Kick-only sets help develop the leg strength needed for fast starts, powerful underwater dolphin kicks off the wall, and sustained kicking throughout a race. Coaches use kickboard sets both as a standalone training tool and as a diagnostic test to identify kick weaknesses that need attention.
What should I do if I get a leg cramp while using a kickboard?
Stop kicking immediately and hold onto the kickboard for buoyancy support. If you are in the middle of the pool, float on your back with the kickboard under your arms and gently stretch the cramped muscle by pulling your toes toward your shin (for a calf cramp) or straightening your leg (for a hamstring cramp). Once the cramp passes, swim slowly to the nearest wall and rest before resuming your kick set. To prevent cramps, stay hydrated, warm up thoroughly, and avoid sudden increases in kick intensity or duration.
Should I kick with or without a kickboard each session?
Ideally, include both in your training. Kickboard sets let you focus on technique and build strength with the support of the board. Kicking without a board — either on your back, side, or in a streamlined position — develops core stability and body position awareness that the board can mask. A good ratio for most swimmers is roughly 60 to 70 percent of kick work with a board and 30 to 40 percent without. As your technique improves, you can gradually reduce your reliance on the board.
Can using a kickboard too much be harmful?
Excessive kickboard training can lead to overuse issues, particularly in the knees (from repetitive flexion and extension), the lower back (from sustained arching if body position is poor), and the hip flexors (from repetitive forward kicking). To minimize risk, vary your kick types (flutter, dolphin, whip), include non-kick training in your sessions, and listen to your body. If you develop persistent pain in any joint, reduce kick volume and consult a sports medicine professional.
What is the best kickboard material for durability?
Closed-cell EVA (ethylene-vinyl acetate) foam is widely considered the most durable kickboard material. Unlike open-cell foam, closed-cell EVA does not absorb water, which means it stays lightweight and buoyant over years of use. It is resistant to chlorine degradation, UV exposure, and physical abrasion. Avoid boards made from open-cell foam, soft rubber, or thin vinyl (inflatable), as these materials degrade faster and provide less consistent buoyancy over time.
How does kickboard swimming compare to running for cardiovascular fitness?
Kickboard swimming provides cardiovascular benefits comparable to moderate-impact running but with the significant advantage of being non-weight-bearing. A 30-minute moderate kickboard session elevates the heart rate to a similar zone as a 30-minute jog, but without the repetitive impact forces that stress the knees, shins, and ankles. This makes kickboard swimming an excellent alternative for people who want cardiovascular training but cannot or prefer not to run due to joint issues, injury history, or personal preference.
Can I use a kickboard if I have a shoulder injury?
Yes, kickboard swimming is one of the best ways to maintain cardiovascular fitness and lower-body strength while recovering from a shoulder injury, because the arms rest passively on the board and do not perform overhead movements. However, gripping the board requires some shoulder stability, so if your injury is severe, use a smaller board or an alternative like a pull buoy placed under the chest for buoyancy without the need to grip. Always follow the guidance of your physical therapist or doctor regarding when and how to return to pool activity after a shoulder injury.
How do I teach a child to use a kickboard for the first time?
Start in shallow water where the child can stand comfortably. Let them hold the kickboard in a “hugging” position — arms draped over the top, chin resting on the board — and practice blowing bubbles while kicking gently. Keep the first sessions very short (5 to 10 minutes) and focus on fun rather than technique. As the child gains confidence, gradually introduce the standard arm-extended grip and encourage them to kick across short distances. Celebrate progress and never force a child to go deeper or kick farther than they are comfortable with.
Conclusion
A kickboard is a simple piece of equipment, but used correctly it can transform your kick technique, build real leg strength, and make you a more efficient, confident swimmer overall. Whether you are a complete beginner just learning to kick, a fitness swimmer looking for a low-impact cardio workout, a competitive athlete training for faster starts and turns, a triathlete building swim endurance for race day, or a senior maintaining strength and mobility in the water, a kickboard adapts to your goals and fitness level.
Start with the fundamentals — grip, body position, and kick rhythm — before layering in drills and a structured training plan. Include a variety of kick types (flutter, dolphin, and whip kick) for balanced lower-body development. Pair your kickboard work with proper warm-up and cool-down routines, stay hydrated, and increase training volume gradually to avoid overuse injuries.
With a few focused sessions each week, most swimmers notice a real difference in kick power within a month. The key is consistency, attention to technique, and a willingness to push past the initial discomfort that comes with asking your legs to do all the work. The reward is a faster, more efficient kick that makes every stroke you swim — whether it is freestyle, backstroke, breaststroke, or butterfly — more powerful and more effortless.

Ready to put this guide into practice? A quality contoured kickboard is the easiest way to start building better kick technique today.
Get a Kickboard on Amazon