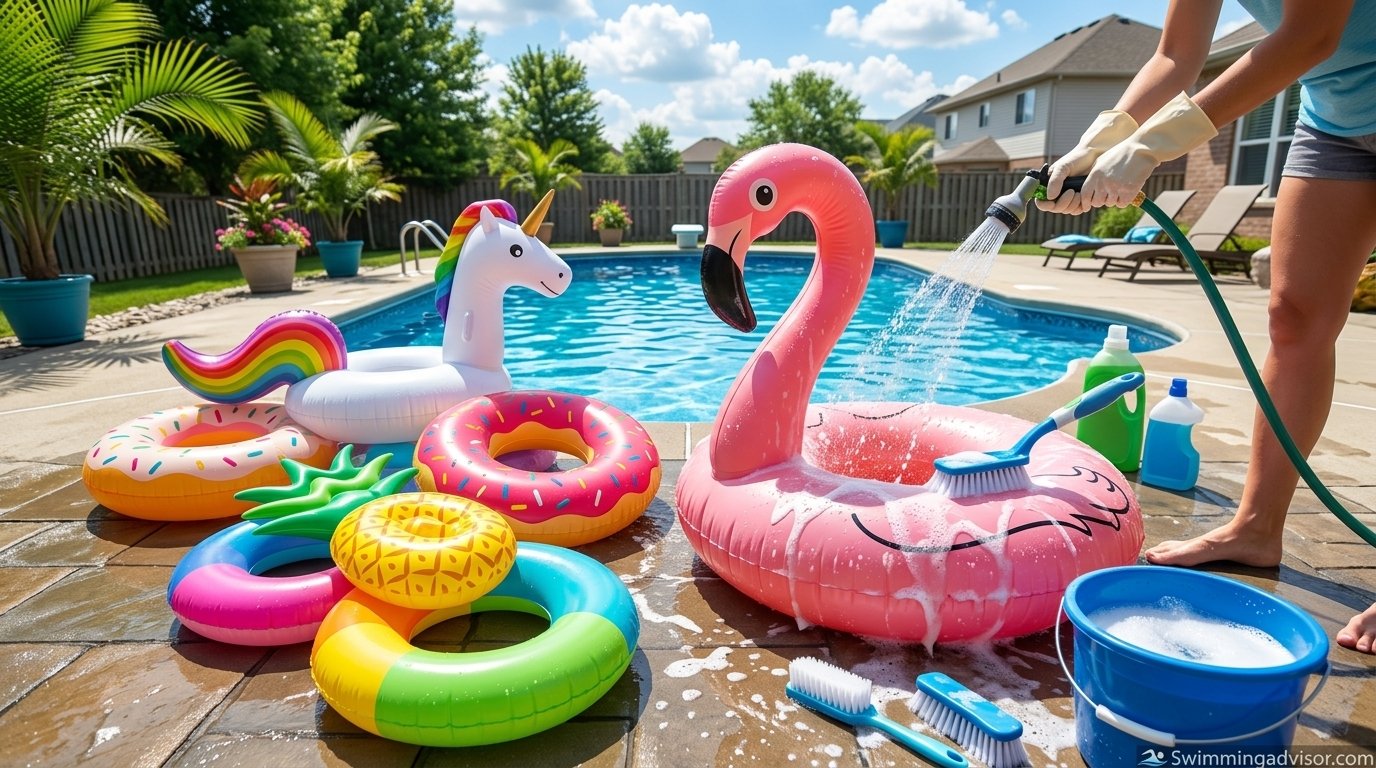
How to Clean Pool Floats: The Complete Step-by-Step Guide
A practical, no-guesswork method for getting sunscreen grime, mildew, and pool chemicals off every kind of float — vinyl, PVC, mesh, and fabric-covered alike.
There’s a very specific kind of disappointment that hits when you unroll a pool float you loved last summer and find it streaked with grey mildew, sticky patches of old sunscreen, and a faint locker-room smell that no amount of sunshine seems to fix. The good news is that almost none of this is permanent. Pool floats are tougher than they look, and with the right technique — not a random dish-soap scrub, but an actual method — you can bring a neglected float back to something close to new. This guide walks through exactly how to do that, covering every common float material, the specific problems that show up with mold, sunscreen, and hard water, and the small habits that keep you from having to do a deep clean at all.
What makes float cleaning different from cleaning most other pool gear is that a float is essentially a sealed air chamber wrapped in a flexible skin, which means dirt and moisture behave differently than they do on a hard-surfaced item like a skimmer or a ladder. Grime doesn’t just sit on top — it works into the texture of the vinyl, settles into folds and seams, and, if the float is ever packed away even slightly damp, gets trapped where sunlight and airflow can’t reach it. That’s the reason a float that looks reasonably clean on the outside can still develop a musty smell weeks later in storage. Understanding that distinction is really the foundation of everything else in this guide: cleaning the visible surface and drying the whole float, inside and out, are two separate jobs, and skipping the second one is why so many floats end up looking prematurely worn out after only a season or two of use.
It also helps to think about float cleaning on two timelines at once. There’s the short-term job — getting today’s sunscreen film and pool-deck grit off before you pack the float away — and the long-term job, which is protecting the vinyl or fabric itself from the slow, cumulative damage caused by chlorine, UV exposure, and body oils. A rushed hose-down handles the first. It does almost nothing for the second. The step-by-step method later in this guide is built to satisfy both at once, without adding much extra time to your normal post-swim routine.
1Why Cleaning Pool Floats Actually Matters
It’s tempting to treat a pool float like a beach towel — rinse it, let it dry, throw it in a bin, done. But floats sit in an environment that’s uniquely hard on materials: chlorinated or salted water, direct UV exposure, body oils, sunscreen, and long stretches of damp storage. Each of those factors accelerates a different kind of damage.
Chlorine and salt residue left to dry on vinyl slowly breaks down the plasticizers that keep the material flexible, which is part of why old floats get stiff and crack along the seams. Sunscreen and body oil create a film that traps dirt and gives mold spores something to grab onto — this is almost always the real cause of those dark spots people assume is “just dirt.” And because floats are usually packed away while still slightly damp, the inside of the float becomes a closed, humid environment that’s close to ideal for mildew growth.
Regular cleaning isn’t about vanity. It directly extends the working life of the float, keeps the vinyl supple so it doesn’t split under weight, and — importantly — keeps the surface hygienic for skin contact, which matters more than most people think if the float is used by kids or by anyone with sensitive skin. A float that’s cleaned properly every few uses can realistically last several seasons longer than one that’s only rinsed with a hose.
There’s also a practical financial argument here that’s easy to overlook. A quality inflatable float, lounger, or novelty shape is rarely a cheap impulse purchase anymore — many of the sturdier, better-built options represent a real investment for the season. Treating cleaning as routine maintenance, the same way you’d treat oil changes for a car or reseasoning a cast-iron pan, changes the math significantly. Instead of replacing a float every year because it’s gone stiff, faded, or started smelling, a consistent care routine can stretch that replacement cycle out considerably, which adds up quickly if you own more than one float or replace them for a family.
From a material science standpoint, what’s actually happening when a float goes from soft and pliable to stiff and prone to cracking comes down to plasticizers — the chemical compounds blended into PVC during manufacturing specifically to keep it flexible. Chlorine, salt, UV light, and body oils all interact with these plasticizers over time, gradually pulling them out of the material or breaking them down chemically. Once enough plasticizer is lost, the vinyl behaves more like a rigid plastic than a flexible one, and that’s when you start seeing hairline cracks form along stress points like seams, fold lines, and the base of handles. Rinsing off the substances that accelerate this process — chlorine residue especially — is one of the few things an owner can actually control, which is part of why the “rinse after every use” habit matters so much more than it might seem.
A pH-balanced spray formulated to lift sunscreen film and mildew stains from vinyl and PVC without degrading the material.
Check Price on Amazon2Supplies You’ll Need Before You Start
You don’t need a specialty product line to clean a pool float well. Most of what works best is already in a kitchen or laundry cabinet. Here’s the full kit, split into “essential” and “nice to have.”
| Supply | Purpose | Essential? |
|---|---|---|
| Mild dish soap or baby shampoo | Cuts oil and sunscreen film without harming vinyl coatings | Yes |
| Soft-bristle brush or sponge | Physical scrubbing without scratching the surface | Yes |
| Garden hose or bucket of clean water | Rinsing away soap and loosened debris | Yes |
| White vinegar | Breaks down mold, mildew, and hard water spots | Yes |
| Microfiber cloth | Final wipe-down and drying assistance | Yes |
| Vinyl repair patch kit | Fixing small punctures found during inspection | Nice to have |
| Vinyl protectant/UV spray | Slows sun damage and cracking after cleaning | Nice to have |
| Soft-bristle drying rack or mesh line | Keeps float ventilated while it dries flat | Nice to have |
Avoid reaching for bleach, ammonia, or strong solvent-based cleaners as a first option. They can work in small, diluted doses for stubborn mold, but used carelessly they break down the vinyl’s flexibility and can fade printed designs. We’ll cover exactly when and how to use a diluted bleach solution safely in the disinfecting section below.
It’s also worth setting aside supplies specifically for float cleaning rather than grabbing whatever sponge is currently in the kitchen sink. A sponge or brush that’s been used on greasy pans can carry a thin film of cooking oil that transfers onto the vinyl and actually attracts more dirt than it removes. Keeping a dedicated, clearly labeled brush and bucket for pool gear avoids this cross-contamination entirely and means the supplies are always on hand exactly when you need them.
3How to Clean Pool Floats: Step-by-Step Method
This is the core method that works for the vast majority of vinyl and PVC floats — flamingos, donuts, loungers, and novelty shapes alike. Follow these six steps in order; each one sets up the next.
Step 1 — Deflate and Rinse
Open the valve and let the float deflate most of the way — you want it soft enough to fold and access every seam, but not fully flat, since some structure makes scrubbing easier. Hose it down on both sides to remove loose sand, grass, and surface dirt before any soap goes on.
This initial rinse matters more than it seems. Any grit left on the surface effectively turns your sponge into light sandpaper once you start scrubbing in the next step, which is how tiny surface scratches build up on vinyl over repeated cleanings. Taking the extra thirty seconds here to hose off loose debris protects the finish through every wash that follows, not just this one.
Step 2 — Mix a Gentle Cleaning Solution
In a bucket, combine warm water with a small amount of mild dish soap or baby shampoo — roughly one teaspoon per two liters of water. Baby shampoo is a good option because it’s specifically formulated to be gentle, which matters on printed or laminated vinyl.
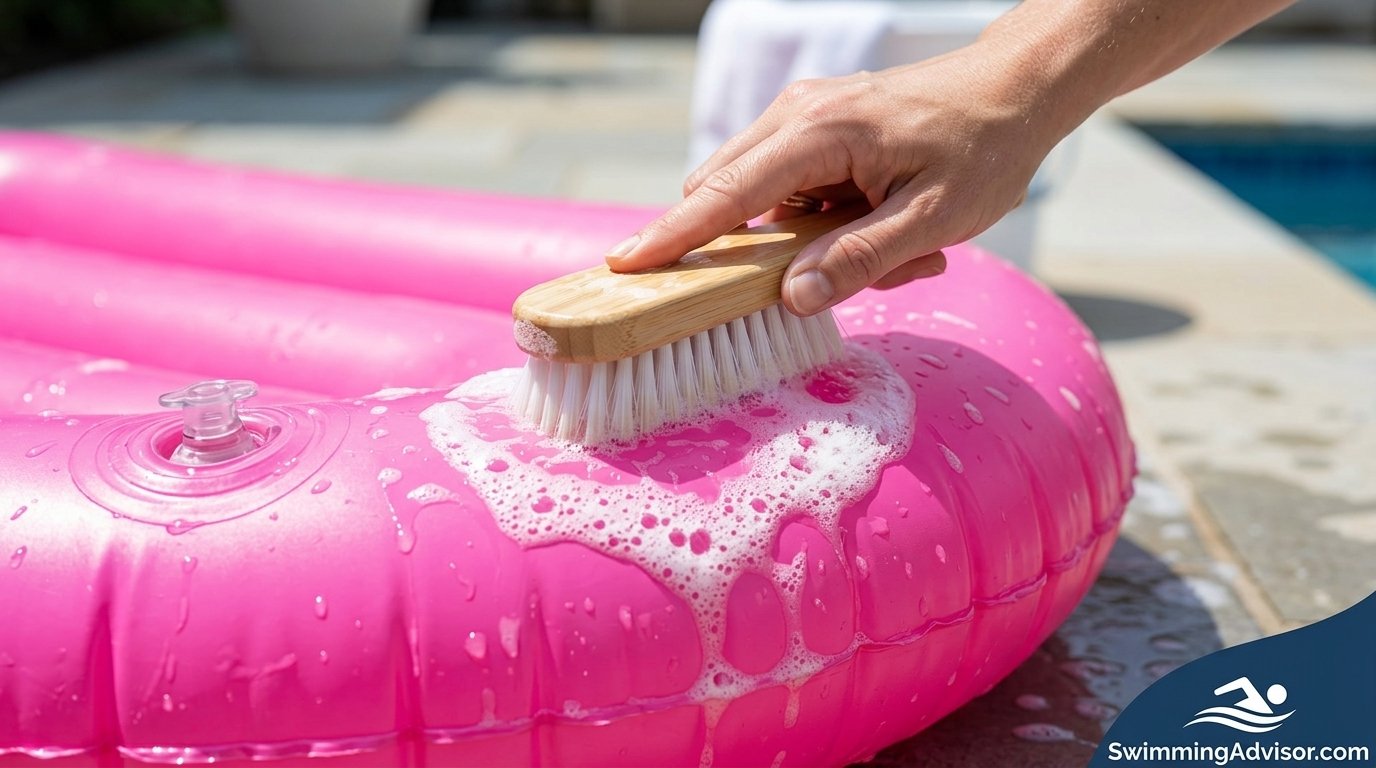
Step 3 — Scrub the Surface in Circular Motions
Dip a soft-bristle brush or sponge into the solution and work in small circular motions rather than long straight strokes — circles lift grime more evenly and are gentler on printed designs. Pay extra attention to seams, valve areas, and any crevices where a flamingo neck or unicorn horn meets the body, since dirt and moisture collect there first.
Work in manageable sections rather than trying to cover the whole float in one pass — start at one end, fully scrub and rinse that section, then move on. This keeps the soap from drying on the surface before you get to it, which can leave faint residue streaks once the float dries. On heavily detailed novelty floats, an old, soft toothbrush is genuinely useful for tight spots like molded texture lines or narrow handle grips that a standard brush can’t reach.
Step 4 — Rinse Thoroughly on Both Sides
Any soap left behind attracts dirt faster than a completely clean surface, so rinse until the water runs completely clear with no suds. Flip the float and repeat on the underside — it’s easy to skip this side, but it collects just as much grime from pool decks and grass.
Step 5 — Dry Completely Before Storing
Lay the float on a mesh rack or hang it over a line in a shaded, well-ventilated spot. Direct, prolonged sun accelerates vinyl breakdown, so aim for shade with good airflow rather than blasting sun. Make sure the inside cavity is also dry — trapped moisture inside a folded float is the single biggest cause of mildew smell.
Step 6 — Inspect for Damage Before Packing Away
With the float clean and dry, run your hands over every seam and check for soft spots, tiny punctures, or valve wear. This is the easiest time to spot a slow leak, long before it becomes an annoying mid-float deflation next time you use it.
If you find a puncture, mark it with a small piece of tape so you can find it again once the float is fully dry, then patch it with a vinyl repair kit before your next swim. And if inflating and deflating floats every season already feels like a chore, our guide on how to blow up pool floats efficiently covers tools that make it much faster.
A gentle multi-size brush set designed for vinyl and inflatable surfaces — safe on printed designs and seams.
Check Price on Amazon4Deep Cleaning: Removing Mold and Mildew
If the basic wash didn’t fully clear dark spotting, you’re likely dealing with mold or mildew that’s worked into the texture of the vinyl rather than sitting on top of it. This calls for a stronger — but still material-safe — solution.
The vinegar method: Mix equal parts white vinegar and water in a spray bottle. Spray the affected area generously and let it sit for 10–15 minutes; the acidity breaks down mold’s cell structure without bleaching color or weakening the vinyl. Scrub with a soft brush, then rinse thoroughly. For particularly stubborn spots, a paste of baking soda and a small amount of water applied directly to the stain and left for a few minutes before scrubbing adds extra abrasive lifting power.
For mold that’s spread through fabric-covered floats (the cushioned lounger type with a removable or sewn fabric layer), treat it more like treating mildew on outdoor cushions: spray, let it dwell, scrub with a stiffer brush, then rinse and dry in full sun, since UV light itself helps kill remaining mold spores on fabric — unlike on vinyl, where you want to limit direct sun exposure.
If mold keeps returning to the same float after repeated deep cleans, it’s worth checking your storage environment rather than assuming the cleaning method isn’t working. Mold spores are present almost everywhere in outdoor air, and a float stored in a consistently humid space — a closed shed, an unventilated garage corner, or a plastic bin without airflow — will keep reintroducing spores onto an otherwise clean surface. In that situation, improving airflow around the storage location does more long-term good than any stronger cleaning solution would.
5Cleaning Approach by Float Material
Not every float is made the same way, and using the wrong intensity of cleaning on the wrong material either under-cleans it or slowly damages it. Here’s how the main categories differ.
| Material | Best Cleaner | Watch Out For |
|---|---|---|
| Standard PVC/vinyl | Mild soap + water, vinegar for mold | Cracking if left in direct sun while wet |
| Printed/laminated vinyl | Baby shampoo, avoid abrasive scrubbing | Fading or peeling of printed graphics |
| Mesh loungers | Hose rinse + soft brush, mild soap | Frame corrosion if metal parts stay wet |
| Fabric-covered / cushioned | Vinegar spray + stiff brush + sun-drying | Mold growing inside foam padding |
| Clear/glitter vinyl | Soap + water only, no vinegar (can cloud material) | Cloudiness from harsh chemicals |
If you’re outfitting a whole family and want floats rated to handle more frequent use and cleaning cycles, it’s worth checking options built for durability — our roundup of the best pool floats for heavy adults highlights reinforced-seam models that also tend to hold up better to repeated scrubbing.
It’s worth going a bit deeper on why standard and printed vinyl need slightly different handling, since it’s the most common mix-up. Standard, single-color vinyl gets its color from pigment mixed directly into the PVC compound during manufacturing, which means the color goes all the way through the material — scrubbing a bit harder generally won’t remove it. Printed and laminated designs, on the other hand, are usually applied as a thin ink layer on top of the base vinyl, sometimes sealed under a clear laminate coating. That printed layer is what’s actually vulnerable to abrasive scrubbing, strong solvents, and prolonged sun exposure, which is why the same amount of scrubbing pressure that’s perfectly fine on a plain pastel float can leave a printed unicorn design looking dull or patchy after a season.
Mesh loungers deserve a specific mention because they’re often overlooked in cleaning routines — people tend to treat the frame and the mesh fabric as one unit and either over-clean the frame or under-clean the fabric. The woven mesh should be scrubbed gently along the weave direction rather than against it, which prevents individual fibers from fraying at the intersections. Frame joints, especially on floats with metal or resin connectors, should be dried thoroughly and occasionally checked for the beginnings of rust or white mineral buildup, since a corroded joint is one of the few float issues that can’t be fixed with cleaning alone.
6Removing Stains, Sunscreen & Suntan Oil
Sunscreen residue is the most common stubborn stain on pool floats, and it’s also the one most people clean wrong. Sunscreen is oil-based, so plain water rinsing barely touches it — you need something that breaks down oil specifically.
Dish soap is actually excellent here precisely because it’s designed to cut grease. Apply it directly to the stain undiluted, let it sit for a couple of minutes, then scrub in circles before rinsing. For oil stains that have set in and turned slightly yellow or waxy, rubbing alcohol on a cloth (test on a hidden spot first) can lift what soap alone won’t, followed by a full soap-and-water wash to remove any alcohol residue.
Grass and dirt stains respond well to a baking soda paste, while rust spots — common if a float has been near metal pool ladders or furniture — need a mild acidic approach like the vinegar solution used for mold, since rust is also broken down by acidity.
One detail worth flagging specifically: spray sunscreens and mineral-based (zinc oxide or titanium dioxide) formulas tend to leave more visible residue than lotion sunscreens, simply because the aerosol mist settles more broadly across the float’s surface rather than transferring only where skin makes contact. If your household mainly uses spray sunscreen, building a quick wipe-down into the routine every single time — not just at the end of the day — keeps that residue from accumulating into the kind of stain that needs a dedicated soap treatment later.
An oil-cutting formula built for outdoor vinyl and fabric surfaces — safe for printed float designs.
Check Price on Amazon7Disinfecting Pool Floats Safely
Cleaning removes visible dirt; disinfecting reduces bacteria and viruses on the surface, which matters more for floats used across multiple families, at rentals, or by young children who put their mouths near valves and handles. This step is optional for casual home use but worth doing periodically.
The safest home disinfecting solution is a highly diluted bleach mix: one tablespoon of unscented household bleach per gallon of water. Apply with a cloth or spray bottle, let it sit for about a minute, then rinse thoroughly and dry completely — never let diluted bleach sit longer than a minute or two on vinyl, since prolonged contact can cause discoloration.
When to Disinfect
- Float used by multiple households or at a rental property
- After illness in the household
- Float stored for an extended period before reuse
- Visible mold that soap and vinegar didn’t fully clear
Skip Disinfecting If
- Float is used exclusively by your own household regularly
- Surface is already visibly clean after a standard wash
- Material is delicate glitter/clear vinyl prone to clouding
- You’ve already cleaned it within the last week
For households that would rather avoid bleach altogether — common with young kids, pets, or anyone sensitive to chemical smells — hydrogen peroxide is a solid alternative. A 3% solution, the standard concentration sold for household use, can be applied directly and left for a few minutes before rinsing. It’s effective against a broad range of bacteria and mold without the fume concerns that come with bleach, and it breaks down into water and oxygen rather than leaving chemical residue behind. It’s slightly less aggressive than diluted bleach against heavy mold, so for genuinely stubborn cases it may take a repeat application rather than a single pass.
8Common Cleaning Mistakes to Avoid
Most of the damage that shows up on pool floats over time isn’t caused by normal wear from swimming — it’s caused by well-intentioned cleaning done the wrong way. The table below covers the mistakes that come up most often, along with why each one causes more harm than good and what to do instead.
| Mistake | Why It’s a Problem | What to Do Instead |
|---|---|---|
| Using undiluted bleach | Weakens vinyl, causes discoloration and cracking | Use a highly diluted solution, brief contact time only |
| Scrubbing with stiff wire brushes | Scratches surface, creates entry points for mold | Soft-bristle brush or sponge only |
| Storing while damp | Traps moisture, breeds mildew inside the float | Fully air-dry inside and out before folding |
| Drying in full midday sun | Accelerates vinyl brittleness and fading | Dry in shade with good airflow |
| Ignoring the underside | Collects as much grime as the top surface | Flip and clean both sides every time |
| Mixing bleach and vinegar/ammonia | Produces toxic chlorine gas | Never combine — pick one method per clean |
9How Often Should You Clean Pool Floats?
A light rinse-and-wipe after every use is the single most effective habit, since it prevents sunscreen and body oil from ever fully setting into the material. Beyond that:
- After every swim session: hose down and wipe dry before packing away.
- Weekly during heavy summer use: a full soap-and-water wash following the six-step method above.
- Monthly, or at first sign of spotting: a deep clean with the vinegar method for mold prevention.
- Before seasonal storage: a full wash, complete dry, and optional disinfecting pass before the float goes into off-season storage.
Floats used in saltwater pools or hot climates tend to need more frequent attention, since both salt residue and heat speed up the buildup that leads to staining and material fatigue.
A useful rule of thumb if you’re unsure whether a float is due for cleaning: run a clean, dry hand across the surface. If it feels even slightly tacky or leaves a faint residue on your palm, that’s sunscreen or body oil film building up, and it’s a better indicator than visual inspection alone, since this kind of residue is often close to invisible until it’s collected enough dust and grit to become noticeably dull or gritty to the touch.
10Drying and Storing Floats the Right Way
Cleaning and storage are really one continuous process — a perfectly cleaned float that’s folded away damp will grow mildew just as fast as one that was never cleaned at all. Once a float passes the “fully dry” check from Step 5, storage technique determines how well it holds up until next season.
Loosely roll rather than tightly fold floats where possible, since sharp folds under weight over months of storage are a common cause of seam cracking. Store in a breathable bag or bin rather than a fully sealed plastic bag, which can trap any residual humidity. For the complete breakdown of ideal storage conditions, container types, and seasonal prep, see our dedicated guide on how to store pool floats.
A ventilated storage bag that keeps floats protected from dust and sunlight while allowing residual moisture to escape.
Check Price on Amazon11Choosing Floats That Are Easier to Clean
If you’re shopping for new floats, a few design details make ongoing maintenance dramatically easier down the line. Heavier-gauge vinyl resists scuffing and holds up to more frequent scrubbing without thinning. Simple, smooth shapes with fewer tight crevices (compared to highly detailed novelty shapes) are faster to clean thoroughly. Reinforced, double-stitched or welded seams are less likely to trap grime and are more resistant to the wear that scrubbing adds over time.
It’s also worth paying attention to valve design when comparing floats, even though it rarely gets mentioned in typical buying guides. A recessed, screw-cap style valve is far less prone to trapping soap residue and grit than an exposed flip-style valve, which means less chance of the slow-deflation issue covered in the troubleshooting section later in this guide. Color is a smaller but real factor too — very light pastel or white vinyl shows sunscreen and dirt staining much sooner than mid-tone or saturated colors, purely because of contrast, even though the actual amount of grime buildup is identical. If low-maintenance appearance matters to you, leaning toward mid-tone colors over pale ones is a simple way to reduce how often a float looks like it needs cleaning, even on the same wash schedule.
Our best floaties guide and best pool floats for heavy adults guide both call out material thickness and seam construction, which are the two specs worth prioritizing if long-term cleanability matters to you as much as comfort.
12Related Pool Gear Worth Having on Hand
A clean float is one part of a smoother pool routine. A few related essentials tend to come up in the same context as float maintenance:
- If little ones are using the floats, reliable swim diapers cut down significantly on the kind of contamination that leads to more frequent deep cleaning.
- Pairing floats with a well-maintained inflatable swimming pool means less debris and dirt transferring onto float surfaces in the first place.
- For families tracking pool time and activity, a swimming watch is a handy add-on for lap swimmers who also use floats for recovery time.
- If your pool routine includes active swim training alongside float lounging, swim paddles are a useful complementary accessory for the same pool sessions.
13Troubleshooting: Punctures, Leaks & Lingering Odors
Even a well-cleaned float can develop issues that cleaning alone won’t fix. Here’s how to handle the most common ones.
Slow leaks: Inflate the float fully and listen or feel along seams and around the valve for escaping air, or use the classic soapy-water test — bubbles will form at the leak point. Mark it, let it dry, and apply a vinyl patch.
Persistent musty smell after cleaning: This almost always means moisture is trapped inside the float itself, not just on the surface. Inflate the float fully in a dry, ventilated space for 24–48 hours before deflating and storing again — this dries the interior air pocket, not just the outer skin.
Valve won’t hold air properly: Check for small debris or dried soap residue lodged in the valve flap after cleaning, which is a common and often-overlooked cause of slow deflation.
If you’re regularly inflating and deflating floats as part of your cleaning and storage routine, an efficient pump makes the whole process faster — see our comparison in how to blow up pool floats.
Discoloration that won’t lift with normal cleaning: If a stain has genuinely bonded with the vinyl rather than sitting on the surface — often the case with certain sunscreens containing oxybenzone, which can chemically react with vinyl over prolonged exposure — no amount of scrubbing will fully remove it. At that point the goal shifts from restoring the original color to preventing the stain from spreading or worsening, which mainly means keeping the area clean and dry going forward rather than continuing to scrub aggressively.
Float feels stiff or brittle despite regular cleaning: This usually signals that plasticizer loss has already progressed significantly, often from a combination of age and UV exposure rather than anything you did wrong. A vinyl protectant spray applied after cleaning can slow further stiffening, but it won’t reverse damage that’s already occurred. At this stage, it’s worth weighing repair against replacement, particularly if stiffness is showing up alongside visible seam stress.
Recurring mold in the exact same spot: If mold keeps reappearing in one specific area even after a thorough vinegar treatment, there’s likely a slow pinhole leak at that location letting moisture into the float’s interior. Treat this as a leak-detection situation first — patch the puncture — and the recurring mold problem usually resolves on its own once the moisture source is sealed.
A complete puncture repair kit for vinyl pool floats, includes adhesive patches for above and underwater use.
Check Price on Amazon14Cleaning Needs by Where You Actually Swim
Not all pool floats live the same life. A float that only ever touches a chlorinated backyard pool faces a very different set of stresses than one that gets dragged to the lake every weekend, and adjusting your cleaning routine to the environment saves a lot of unnecessary guesswork.
Chlorinated pools: The main concern is chlorine residue drying on the surface between uses, which is what accelerates plasticizer breakdown over a season. A thorough rinse with plain water after every use, even without soap, meaningfully slows this process. Chlorine also tends to lighten and fade printed colors over time faster than any other factor, so keeping rinse time short and consistent matters more here than almost anywhere else.
Saltwater pools: Salt residue behaves similarly to chlorine but adds an abrasive, crystalline element once it dries — those fine salt crystals can create micro-scratches if the float is folded or rubbed while still coated in dried salt film. Rinse saltwater floats with fresh water sooner rather than later, and avoid letting salt fully dry on the surface before that rinse happens.
Lakes, rivers, and natural water: Here the bigger issue is organic material — algae, plant matter, and fine silt — rather than chemical residue. These floats benefit from a slightly more thorough soap wash after each outing, since organic matter left on the surface is exactly the kind of food source that mold and mildew thrive on. It’s also worth checking valve areas more closely, since sediment can work its way in more easily than it does in a filtered pool.
Hot tub or spa use: Less common, but the combination of heat and concentrated sanitizer chemicals in a spa is harder on vinyl than standard pool water. Floats or loungers occasionally used in spas should be rinsed and dried promptly rather than left to sit, since the elevated water temperature speeds up every chemical reaction described earlier in this guide.
15A Simple Seasonal Maintenance Calendar
Turning everything in this guide into a routine is easier with a loose calendar to follow rather than trying to remember every rule in the moment. Here’s a practical version built around a typical pool season.
| Time of Season | What to Do |
|---|---|
| Start of season (float comes out of storage) | Full inspection for cracks or dry rot, soap wash, air out interior for 24 hours before first use |
| Throughout summer, after each use | Quick rinse and wipe-dry, especially removing sunscreen film |
| Weekly during peak use | Full six-step soap wash covered earlier in this guide |
| Monthly, or at first sign of spotting | Vinegar-based deep clean for mold and mildew prevention |
| End of season, before storage | Full wash, complete interior and exterior dry, seam inspection, optional disinfecting pass |
Following even a loose version of this calendar is usually the difference between a float that needs a full deep-clean rescue every spring and one that comes out of storage ready to use with barely more than a wipe-down.
?Frequently Asked Questions
Can I put a pool float in the washing machine?
No. Inflatable vinyl floats should never go in a washing machine — the agitation, spin cycle, and any zippers or buckles from other laundry items in the same load can puncture, tear, or damage seams and valves beyond repair. Fabric-covered floats with a fully removable, machine-washable cover are the one exception, but always check the manufacturer’s care label first, and remove any foam padding or inflatable inserts before washing the cover on its own.
What’s the best homemade cleaner for pool floats?
A mix of mild dish soap and warm water handles everyday grime and is gentle enough for daily use. For mold, mildew, and hard water spots, a 50/50 white vinegar and water solution is the most effective homemade option without risking damage to vinyl or fading printed designs. Baking soda paste is a good third option specifically for grass stains and light abrasive lifting on stubborn spots.
Is it safe to use bleach on pool floats?
Only in a highly diluted form — about one tablespoon of bleach per gallon of water, applied briefly and rinsed thoroughly. Undiluted bleach can discolor and weaken vinyl over time.
How do I get mold off a pool float?
Spray the area with a 50/50 vinegar-and-water solution, let it sit for 10–15 minutes, then scrub with a soft brush and rinse thoroughly. Dry completely before storing to prevent regrowth.
Why does my pool float smell musty even after cleaning?
The smell is usually trapped moisture inside the float’s air cavity rather than on the surface. Fully inflate and let it sit in a dry, ventilated area for a day or two to dry the interior before deflating and storing.
How do I remove sunscreen stains from a pool float?
Apply undiluted mild dish soap directly to the stain, let it sit for a couple of minutes to break down the oil, then scrub gently and rinse. Rubbing alcohol can help with older, set-in stains.
How often should pool floats be cleaned?
Rinse and wipe after every use, do a full soap wash weekly during heavy summer use, and a deeper vinegar-based clean monthly or whenever spotting appears.
Can I use a pressure washer on a pool float?
It’s not recommended. The pressure can be strong enough to stretch, tear, or force water into seams and valves, causing more damage than it prevents.
Do I need to clean the inside of an inflatable float?
You can’t scrub the interior, but you should fully dry it by keeping the float inflated in a ventilated space before deflating and storing, since trapped interior moisture is the top cause of odor and mildew.
What should I avoid using to clean a pool float?
Avoid undiluted bleach, ammonia-based cleaners, wire brushes, abrasive scouring pads, and mixing bleach with vinegar or ammonia, which produces toxic fumes.
How do I clean a mesh lounger float?
Hose down both sides, scrub gently with a soft brush and mild soap solution focused on the mesh weave, rinse thoroughly, and make sure any metal frame components are fully dried to prevent rust.
Will cleaning damage the printed design on my float?
Not if you stick to mild soap, soft brushes, and gentle circular motions. Harsh scrubbing, abrasive pads, and strong solvents are what typically cause printed designs to fade or peel over time, since the ink layer sits on top of the base vinyl rather than being mixed all the way through it.
Can I use a UV protectant spray on a pool float?
Yes, and it’s genuinely one of the more effective preventative steps available. Applying a vinyl-safe UV protectant spray after cleaning and drying helps slow the plasticizer breakdown caused by sun exposure, which in turn slows stiffening and cracking. Reapply every few weeks during heavy summer use for the best ongoing protection.
How long does it take for a pool float to fully dry after cleaning?
The exterior surface typically dries within a few hours in a shaded, well-ventilated spot. The interior air cavity takes longer — plan on leaving the float inflated for 24 to 48 hours if you’re specifically trying to dry out trapped moisture that’s causing a musty smell before deflating and storing it again.
Bringing It All Together
Cleaning a pool float well isn’t complicated — it comes down to a consistent routine: rinse after every use, wash weekly with mild soap, deep-clean mold with diluted vinegar, and dry it completely before it goes anywhere near storage. Do that, and a float that might otherwise look tired and stained by mid-summer will hold its color, its flexibility, and its smell for seasons rather than weeks. The small habits — flipping it to clean both sides, checking seams while it’s already out and dry, storing it loosely rather than jammed into a bin — are what actually separate a float that lasts one summer from one that lasts five.
Start with whichever step in this guide addresses your current biggest issue, whether that’s stubborn sunscreen film or a musty storage smell, and build the rest of the routine around it from there. None of it requires special skill, just consistency — and once it becomes a normal part of pool time rather than an occasional chore, you’ll likely find it barely adds any time at all to your routine.
Shop Pool Float Cleaning Essentials