How to Repair Holes in Inflatable Swimming Pools
A complete, step-by-step guide to finding leaks, choosing the right patch, and making repairs that hold all season long.
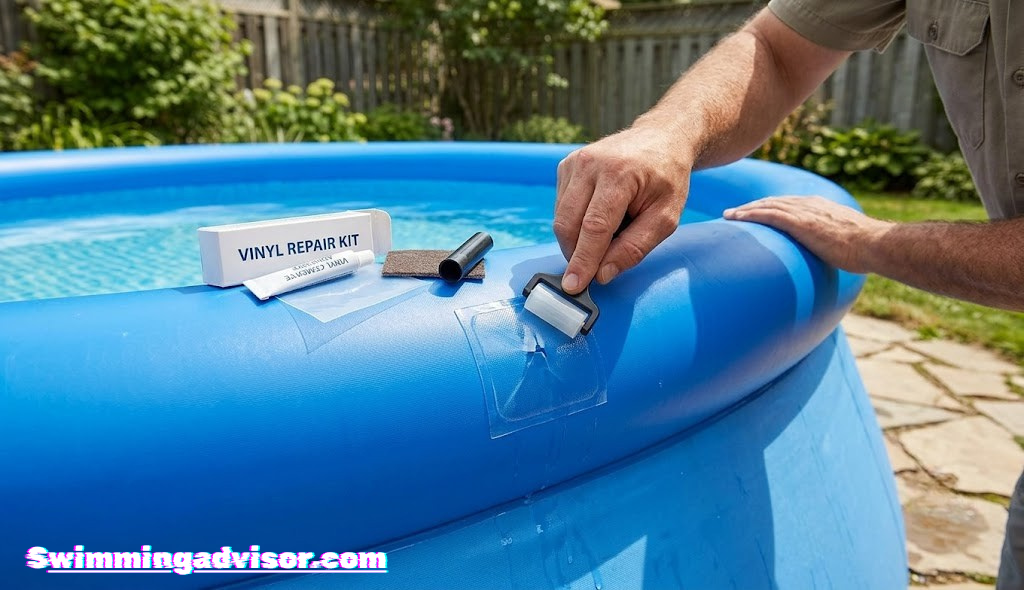
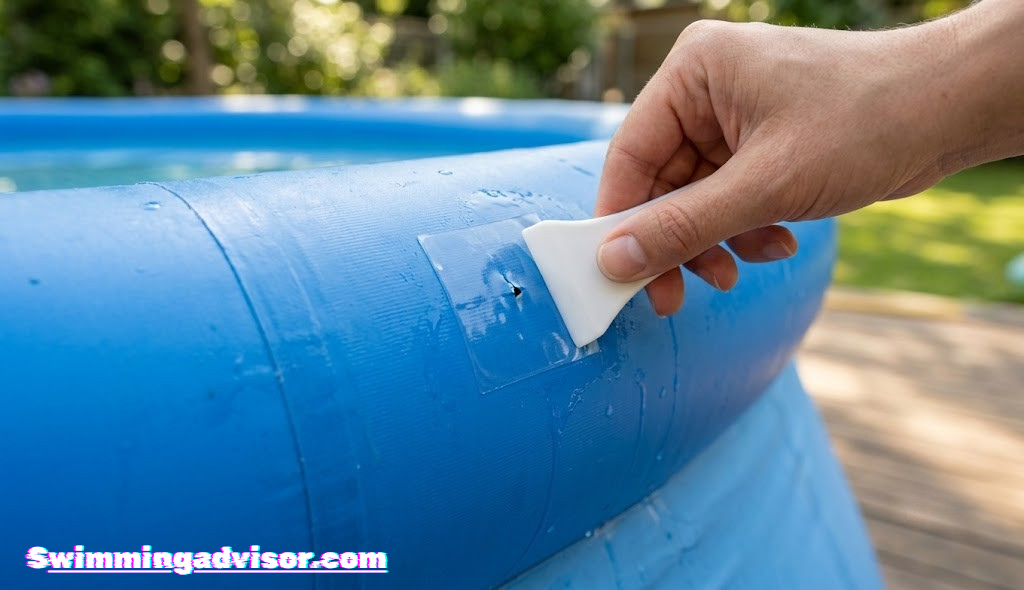
A slow droop or a pool that refuses to hold air overnight is one of summer’s most frustrating surprises — but it almost never means the end of your pool. In most cases, a $5 patch kit and thirty minutes of work is all that stands between you and another full season of cool water. This guide walks you through every repair method in plain language: how to track down the tiniest pinhole, which adhesives actually hold under water pressure, and how to build a fix that lasts longer than a typical bandage-style patch.
Why Inflatable Swimming Pools Develop Holes
Before you fix anything, it helps to understand the enemy. Inflatable pool walls are typically made from multi-layer PVC vinyl — a durable plastic composite designed to flex without cracking, but not immune to damage. The material is far tougher than it looks, but it has predictable weak points that most owners encounter sooner or later.
The Most Common Causes of Leaks
Sharp Objects Underneath
Twigs, rocks, and even coarse gravel work through ground mats over time. This is the single leading cause of pinhole leaks in the pool floor. See what to put under an inflatable pool to prevent this.
UV Degradation
Extended sun exposure breaks down PVC plasticizers, making walls brittle and prone to cracking — especially along folds and crease lines from storage.
Sharp Edges From Users
Fingernails, toenails, jewelry, and toy sharp edges are responsible for a surprising number of sidewall punctures in both kids’ pools and adult-sized pools.
Storage Stress Creases
Folding the same pool along the same crease every year eventually creates micro-fractures. Rotating how you fold extends the material life significantly.
Chemical Imbalance
Incorrect chemical levels, especially chlorine above recommended concentrations, can slowly attack vinyl. Keeping the right chemicals balanced protects the material.
Valve Stress
Inflation valves and drain valves bear the most mechanical stress of any part of the pool. Overtightening caps or repeated inflation pump insertion can degrade valve seats over time.
Understanding which of these applies to your situation helps you not only fix the current hole, but also prevent the next one. If you have a larger inflatable pool for adults, the water pressure against the walls is higher, which means even minor damage can open up faster than in a shallow kids’ pool.

Includes 6 pre-cut vinyl patches, bonding cement, and a cleaning swab. Works on most PVC pool walls, rings, and air mattresses.
View on Amazon →Tools and Materials You Need Before You Start
Running out to buy something mid-repair is frustrating and extends drying time unnecessarily. Gather everything before you deflate or mark the pool. Here is what a complete repair kit looks like:
| Item | Why It’s Needed | Optional? |
|---|---|---|
| Vinyl repair patch kit | The adhesive patch material that seals the hole | No — core item |
| Dish soap & water solution | Bubble test to find invisible pinholes | No |
| Marker or chalk | Mark the leak location before it dries | No |
| Scissors | Round-corner patch cutting for better adhesion | No |
| Rubbing alcohol (91%+) | Surface degreasing before patching | Strongly recommended |
| Clean lint-free cloths | Wiping and surface prep | No |
| Sandpaper (220-grit) | Light scuffing on smooth PVC for better bond | Recommended |
| Heavy book or clamp | Even pressure during adhesive cure | Recommended |
| Aquaseal or vinyl cement | Extra adhesive layer for larger holes | For holes >1 cm |
| Waterproof tape (temporary) | Emergency marking or temporary hold | Optional |
If you are dealing with a premium inflatable swimming pool, it is worth investing in a higher-quality repair kit with UV-resistant adhesive, since economy patches often degrade when left in direct sunlight season after season.
Step 1 – Find the Leak
The biggest mistake most people make is guessing at the leak location. A guess-and-patch approach wastes patches and often misses the actual hole entirely. There are four reliable methods for leak detection, and the right one depends on the pool’s current state.
Bubble Test (The Most Reliable Method)
Mix two tablespoons of dish soap into a spray bottle filled with water. Keep the pool fully inflated. Starting from the valve stem, spray sections of the pool wall in overlapping 12-inch strips. Where bubbles cluster, expand, or pop repeatedly, your leak is there. Circle it immediately with a permanent marker before the soap dries.
Work systematically — don’t just spray where you suspect. The actual hole is often several inches away from where water appears to be seeping. Air travels along the pool wall before finding an exit point.
Listening Test (Dark & Quiet Environment)
In a quiet room or early morning, hold sections of the inflated pool close to your ear and move slowly. A fine hiss reveals even tiny pinholes. Wet your hand lightly — the air stream from the leak will feel cool against damp skin. This works remarkably well for valve leaks that are too slow to bubble-test effectively.
When the Leak Is Invisible
Some pinholes are smaller than a needle tip and impossible to see with the naked eye. In this case, fully deflate the pool, lay the suspect section flat on a clean, dry surface, and inflate just that section by mouth or pump on low. Then re-run the soap test. The reduced surface area concentrates your attention and often makes bubbles appear much more clearly.
Step 2 – Prepare the Surface Properly
Surface preparation is where most DIY pool repairs fail. The adhesive in a patch kit needs a specific type of surface to bond effectively — and PVC vinyl fresh out of the water is about as hostile to adhesive as a wet bar of soap. This step cannot be rushed.
Dry, Degrease, and Scuff the Repair Zone
If the pool was filled with water, drain or partially deflate it so you can access the damaged section. Pat the area completely dry with a lint-free cloth. Let it air dry for at least 10–15 minutes — not just surface dry, but truly dry at the microscopic level. Then wipe a generous amount of rubbing alcohol (91% or higher) in a circular motion over an area roughly twice the size of your patch. Let the alcohol flash off completely (about 60–90 seconds). Finally, use 220-grit sandpaper to very lightly scuff just the area the patch will cover. You are not trying to sand through the vinyl — just creating micro-texture so the adhesive has surface area to grab.
The scuffing step is particularly important for glossy-finish pools. Factory-fresh PVC has a release coating that resists adhesion. A light scuff removes just enough of this layer without thinning the vinyl. You should see the surface go from shiny to slightly matte — that is exactly what you want.
Step 3 – Cut the Right Size Patch
The size and shape of the patch matter more than most guides acknowledge. An undersized patch creates stress points at the edges; a patch with sharp corners peels up from those corners first. Here is how to cut it correctly.
Round-Corner Rule and Sizing Margins
Cut your patch so it extends at least 1 inch (2.5 cm) beyond the hole in every direction. For a 5 mm pinhole, that means a patch roughly 2.5 inches across. Then — and this step is often skipped — use your scissors to round all four corners with a gentle curve. Think of it like rounding the corners of a sticker. Sharp corners are mechanical leverage points where peeling begins. A rounded patch distributes adhesive stress evenly around the entire perimeter.
Patch Material Options
| Patch Type | Best For | Holds Under Water? | Lifespan |
|---|---|---|---|
| Pre-cut vinyl patch (kit) | Pinholes, small holes up to 1 cm | ✓ Yes | Full season |
| Self-adhesive vinyl sheet | Custom sizes, irregular shapes | ✓ Yes | Full season |
| Waterproof repair tape | Emergency temp fix only | ✗ Short-term | Days to weeks |
| Bicycle tube patch | Small holes in thin PVC | ✓ If glued | 1 season |
| Two-part vinyl cement | Tears and large holes (>3 cm) | ✓ Yes | Multi-season |
For a quality inflatable pool for kids that gets heavy daily use, going with a thicker vinyl sheet patch cut to size — rather than a thin kit patch — significantly improves how long the repair holds under the repeated pressure from active splashing.

Industry-standard repair tape with superior elasticity and UV resistance. Used by professionals for pools, inflatables, and kayaks. Works wet or dry.
View on Amazon →Step 4 – Apply the Patch (Adhesive Method)
This is the step where patience pays dividends. Rushing the adhesive application or pressing the patch down carelessly creates air pockets that become peel points. Follow this sequence exactly.
Applying Adhesive to Both Surfaces
Open your patch kit adhesive (typically vinyl cement). Using the brush or applicator, coat the back of the patch with a thin, even layer of adhesive. Then coat the prepared pool surface in the same footprint as the patch. Let both coated surfaces sit open in the air for 60–90 seconds until they become tacky — they should no longer be wet-looking, but should stick slightly if you touch them with a clean finger. This “open time” is when the solvent carrier evaporates and the adhesive reaches its maximum bonding state.
Positioning and Pressing the Patch
Once both surfaces are tacky, carefully align the patch over the hole — remember you only get one chance, since contact adhesive bonds immediately on touch. Press the patch down from its center outward toward the edges using firm thumb pressure. This pushes any trapped air out from underneath. Work your way around the patch edge with your fingernail or a rounded tool, pressing firmly along the entire perimeter. Flip the pool section over if possible and apply pressure from behind as well. Place a heavy book or a flat board over the patch and leave it for a minimum of 2 hours.
Step 5 – Cure Time and Pressure Testing
Curing is not the same as drying. The adhesive needs time to chemically crosslink into a strong polymer bond — not just lose surface moisture. Skipping cure time is the fastest way to end up re-patching in a week.
Minimum Cure Times by Adhesive Type
| Adhesive Type | Minimum Cure | Full Strength | Water-Ready |
|---|---|---|---|
| Standard vinyl cement | 2 hours | 24 hours | 24 hours |
| Two-part epoxy patch | 4 hours | 24 hours | 24 hours |
| Self-adhesive (peel-and-stick) | 1 hour dry | 12 hours | 24 hours |
| Underwater vinyl repair | Immediate (wet) | 48 hours | Immediate |
After the initial cure period, inflate the pool to full pressure and run the soap bubble test directly over the patch. Look for any bubbles forming at the patch edges — a sign that air is escaping under the adhesive perimeter. If bubbles appear, deflate, let dry thoroughly, and apply a thin bead of vinyl cement around the patch edge. Re-press and cure again.
Once the repair passes the bubble test, you can add water. Start with a partial fill and inspect the patch area after an hour. If the pool holds, complete the fill. Pay attention to the first 48 hours — most adhesive failures occur in this window as water pressure fully loads the repair.
After you’ve confirmed the fix, it’s also a smart moment to check that you have the right water level for your pool size, since overfilling increases wall pressure and stresses both old patches and thin seam areas.
The Underwater Patch Method
Draining a large inflatable pool to fix a slow leak is inconvenient, time-consuming, and wastes treated water. If the hole is submerged and small, an underwater vinyl repair is often a better option — and it actually works better than most people expect.
When Underwater Patching Is the Right Call
- The hole is in the pool floor and draining means hours of work
- The leak is very slow (pool loses less than 2 cm per day)
- The pool contains treated water you don’t want to discard
- You have a dedicated underwater vinyl repair kit (not standard kits)
Wet Patch Application Sequence
Standard vinyl cement won’t bond in water — the solvent carrier can’t evaporate and the adhesive washes away. You specifically need an underwater-rated vinyl repair adhesive (often sold as “underwater vinyl sealer” or “aqua patch”). These use a different chemistry that displaces water molecules from the PVC surface during application.
To apply: Cut your round-cornered patch and fold it in half adhesive-side out. Submerge your hand and unfold the patch directly over the hole, pressing from the center outward. Apply sustained firm pressure for at least 3 minutes without letting go. The water pressure will help hold the patch flat. Once released, the bond forms within 30–60 minutes underwater and reaches full strength over 48 hours.

Bonds permanently to PVC underwater with no draining required. Includes applicator brush and 6 pre-sized patches.
View on Amazon →Fixing Leaky Valves
Valve leaks are frustratingly common and often misdiagnosed as wall or floor holes. If your pool deflates slowly overnight but you can’t find a bubble anywhere on the vinyl surface, the valve is your prime suspect. Valve leaks account for roughly 30–40% of all reported inflatable pool air loss.
How to Confirm a Valve Leak
Apply a generous amount of soap solution directly to the valve cap and valve opening. Squeeze the pool wall gently near the valve to pressurize that area slightly. If bubbles form around the valve stem, inside the cap, or between the valve and the pool wall, you have a valve leak rather than a wall puncture.
Types of Valve Leaks and Fixes
| Valve Issue | Symptoms | Fix |
|---|---|---|
| Loose valve cap | Bubbles only at cap threads | Tighten, replace cap, wrap with PTFE tape |
| Cracked valve body | Bubbles from valve housing | Apply vinyl cement around base, or replace valve |
| Deteriorated valve seat | Slow leak even with cap tight | Apply valve sealant or replace valve insert |
| Valve-to-wall bond failure | Bubbles between valve & vinyl | Remove valve, clean area, re-bond with vinyl cement |
Re-sealing a Valve-to-Wall Bond
This is the most involved valve repair but also the most permanent. Deflate the pool. Using pliers, unscrew the inner valve nut from inside the pool (some valves simply twist out). Clean both the valve flange and the surrounding pool vinyl with rubbing alcohol. Apply a ring of two-part vinyl adhesive around the valve opening on both the valve flange and the pool surface. Press together firmly and let cure upside-down with weight applied for at least 4 hours before reassembling the valve.
For pools with a drain valve in addition to inflation valves — common in larger adult inflatable pools — check the drain valve O-ring as well. A cracked or flattened O-ring is easily replaced with a hardware store rubber O-ring of matching diameter, and often costs under $1.
Repairing Seam Separations
Seam separations are the hardest type of inflatable pool damage to repair and the one most likely to mean the end of a pool’s useful life. Seams are the heat-welded or glued joints where two panels of vinyl meet. When this bond fails — usually due to age, UV exposure, or overfilling — you are trying to recreate a factory-level weld at home.
Assessing Seam Damage
A seam separation typically looks like a visible gap or bubbling along a panel edge. You’ll see one of these scenarios:
- Partial separation: 1–5 cm of seam has opened, rest still bonded — often repairable
- Full panel seam failure: An entire edge has lifted — extremely difficult to repair long-term
- Seam crack: The vinyl itself hasn’t separated but has cracked at the seam fold — patchable
Two-Adhesive Seam Re-bond
For partial separations, clean and dry the inner faces of both vinyl edges thoroughly. Using a toothpick or thin applicator, work vinyl cement into the gap between the separated panels. Press the panels firmly together and tape them closed with waterproof tape as a clamp. Cure for at least 24 hours. Then apply a vinyl patch strip over the entire seam on both the inside (if accessible) and outside faces to bridge the repair and protect the adhesive from water pressure.
✓ When Seam Repair Is Worth It
- Pool is relatively new and otherwise in good condition
- Separation is small (<5 cm)
- Vinyl panels are still thick and flexible
- Pool is a larger or more premium model
✗ When to Replace Instead
- Multiple seams have failed or are softening
- Vinyl is visibly brittle, chalky, or cracked
- Separation is more than 10–15 cm long
- Pool is a very low-cost model nearing end of life
If you’re dealing with repeated seam failures on the same pool, it may be more economical to invest in a quality replacement. Check our guide to the best inflatable swimming pools to compare models with the most durable welded seam construction.
Patch Kit Comparison: Which One Should You Buy?
The patch kit market is crowded with products that look similar but perform very differently. Here is an honest breakdown of the most commonly available options and where each one shines or falls short.
| Product Type | Works Dry | Works Underwater | UV Resistant | Ideal For | Price Range |
|---|---|---|---|---|---|
| Intex Repair Kit | ✓ | ✗ | ✗ | Quick pinholes, Intex pools | $ |
| Tear-Aid Type A | ✓ | ✗ | ✓ | Thick-walled pools, long-term | $$ |
| Aquaseal Vinyl | ✓ | ✓ | ✓ | Any hole, professional results | $$ |
| Bikini Bottom Patch | ✓ | ✗ | Partial | Budget pools, seasonal use | $ |
| Two-Part Vinyl Cement | ✓ | ✗ | ✓ | Large holes, seam repairs | $$ |
| HH-66 Vinyl Cement | ✓ | ✗ | ✓ | Commercial-grade, all PVC | $$ |
The Aquaseal family of products is widely regarded as the most versatile option because it bonds both wet and dry. For budget pools like many of the popular inflatable pools for kids, a standard Intex kit is perfectly adequate. For heavier-duty adult pools or above-ground pools with thicker walls, Tear-Aid or HH-66 provide a more permanent repair.

Bonds PVC to PVC permanently. Widely used by bounce house and inflatable pool repair professionals. Includes brush applicator.
View on Amazon →How to Prevent Future Holes and Leaks
The best repair is the one you never have to make. A few consistent habits dramatically reduce the frequency of leaks and extend the usable life of any inflatable pool by seasons.
Ground Preparation
The single highest-impact prevention measure is proper ground preparation before setup. Rocks, roots, and sharp debris underneath a pool floor are responsible for more punctures than any other cause. Before every setup, clear the area, lay a tarp or foam ground pad, and consider a dedicated pool mat. Our guide on what to put under an inflatable swimming pool covers every option and their trade-offs in detail. And for uneven ground, leveling the ground properly prevents water from pooling to one side and stressing that section of wall.
Chemical Balance
High chlorine concentrations don’t just irritate skin — they degrade PVC vinyl over time. Keep your sanitizer levels within recommended ranges and test the water regularly. For a complete guide, see our breakdown of the right chemicals for inflatable swimming pools.
Seasonal Storage
Improper storage causes more long-term damage than most owners realize. Always clean the pool before storage — residual algae and organic matter accelerate vinyl degradation. Our guide to cleaning an inflatable swimming pool without a pump shows simple methods that take less time than you’d expect. Store the dried pool loosely rolled rather than sharply folded, and consider a dedicated pool cover to protect against UV and dust. See our picks for the best covers for inflatable swimming pools for options that fit a range of pool sizes and shapes.
Pool Hygiene
Keeping the pool clean reduces algae growth and the need for aggressive chemical treatments that stress the vinyl. A periodic algae prevention routine — even for small pools — reduces both biological and chemical stress on the material. See our strategies for keeping algae out of inflatable swimming pools without over-sanitizing.

Thick foam mat designed specifically to protect inflatable pool floors from ground debris. Cuts easily to fit any shape.
View on Amazon →Frequently Asked Questions
No. Super glue (cyanoacrylate) is brittle when cured and does not bond well to flexible PVC. It cracks under the constant flex stress of an inflatable pool, typically failing within hours to days. Always use vinyl cement or a purpose-made PVC patch adhesive.
A properly prepared and applied vinyl patch can last the entire remaining life of the pool — often multiple seasons. The adhesive bond on a well-applied patch is typically stronger than the surrounding vinyl. Patches that fail early almost always do so because the surface was not dry enough or the adhesive didn’t reach full cure before water contact.
Yes, but only with an underwater-rated vinyl adhesive. Standard patch kit adhesives (vinyl cement) require a dry, clean surface and cannot cure in water. Aquaseal and similar underwater repair products use solvent-free chemistry that displaces water from the PVC surface and bonds without air exposure.
There are three common reasons: (1) You missed a second leak — pinholes often occur in clusters from a single sharp object contact. (2) The patch failed because the surface wasn’t dry enough or cured too briefly. (3) The leak is at the valve, not the wall. Re-run the full bubble test methodically over the entire pool surface and valve after each repair.
Yes, once the adhesive has fully cured (24 hours minimum). Cured vinyl cement and patch materials are non-toxic. That said, dog claws are a leading cause of punctures — the same care that applies to human use applies to pet use. A dedicated foldable pet pool with thicker vinyl is often a better long-term choice if dogs use it regularly, since the claw stress on walls is significant. Also see our guide on inflatable pool safety for dogs.
Tear-Aid Type A is for vinyl and PVC materials — this is the correct version for inflatable pools. Type B is formulated for rubber, neoprene, and Hypalon surfaces (like inflatable kayaks and rafts). Using Type B on a PVC pool can result in poor adhesion. Always confirm your pool material before selecting the patch type.
Nighttime is actually ideal for auditory leak detection. Keep the pool inflated, go outside in a quiet moment, and slowly move along the pool with your ear close to the surface. The drop in ambient noise makes the hiss of escaping air much more audible. Wet your palm and hold it near the surface — the slight cooling sensation of air movement makes the location easier to pinpoint.
Generally yes, provided the patch adhesive has fully cured. Heating expands both the water and the vinyl slightly, so a well-bonded patch handles this without issue. Avoid applying heat directly to the patched area — never use a heat gun near a patch to speed curing, as this can cause the adhesive to bubble. Our guide to heating an inflatable pool naturally covers low-risk heating methods that are gentle on patched pools.
For wall and sidewall holes, patch from the outside — this is where water pressure pushes the patch into the vinyl, which helps rather than fights the adhesive bond. For floor holes that are accessible from the inside without filling with water, an inside patch is acceptable. For the most durable floor repairs, apply patches to both the inside and outside surfaces simultaneously.
As a practical guide: holes up to about 2 cm are routinely repairable with standard patch kits. Holes from 2–5 cm require a thick vinyl patch and two-part adhesive, but are still worth attempting. Holes larger than 5 cm, tears along seams, or damage that has compromised a large structural area are generally candidates for pool replacement rather than repair, as the repair itself can become a structural weak point under water pressure.
Conclusion
A hole in an inflatable pool is almost never a death sentence for your summer fun. In the vast majority of cases, the right patch kit and a methodical approach to surface preparation will produce a repair that outlasts the original damage and holds all season long. The key variables are always the same: find the actual leak precisely, prepare the surface until it’s truly dry and scuffed, give the adhesive its full cure time, and use the right patch material for your specific pool material and hole size.
The methods in this guide cover every scenario you’re likely to encounter — from invisible pinholes to valve failures, underwater repairs, and seam separations. Which approach you choose depends on what you find when you investigate. Most repairs cost less than $10 in materials and take under an hour of actual working time, with the rest being cure time where you don’t have to be present.
Take five minutes before every season to inspect your pool for developing damage before it becomes a full leak. The pre-season bubble test is the cheapest and easiest maintenance habit in inflatable pool ownership. Combine it with proper ground preparation, correct chemical balance, and smart storage, and your inflatable pool should reward you with many seasons of reliable use.
Ready to Stock Up on Repair Supplies?
Browse our curated picks for the best inflatable pools — from family-sized pools to pet-friendly foldables — with expert buying guidance built in.
Explore Best Inflatable Pools →