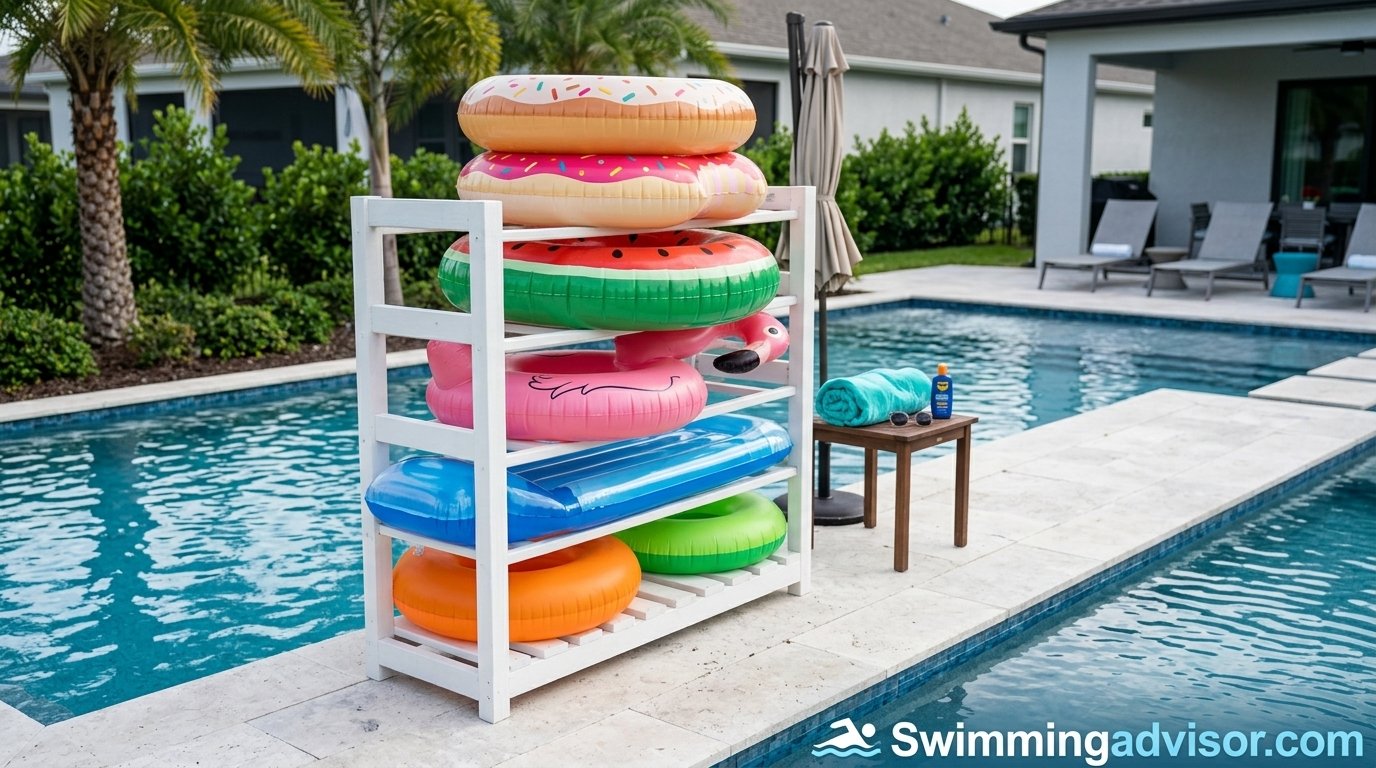
How to Store Pool Floats the Right Way (So They Last for Years)
A complete, practical guide to cleaning, deflating, folding, and storing every type of pool float — from vinyl loungers to foam noodles — so they stay mold-free, crack-free, and ready for the next swim day.
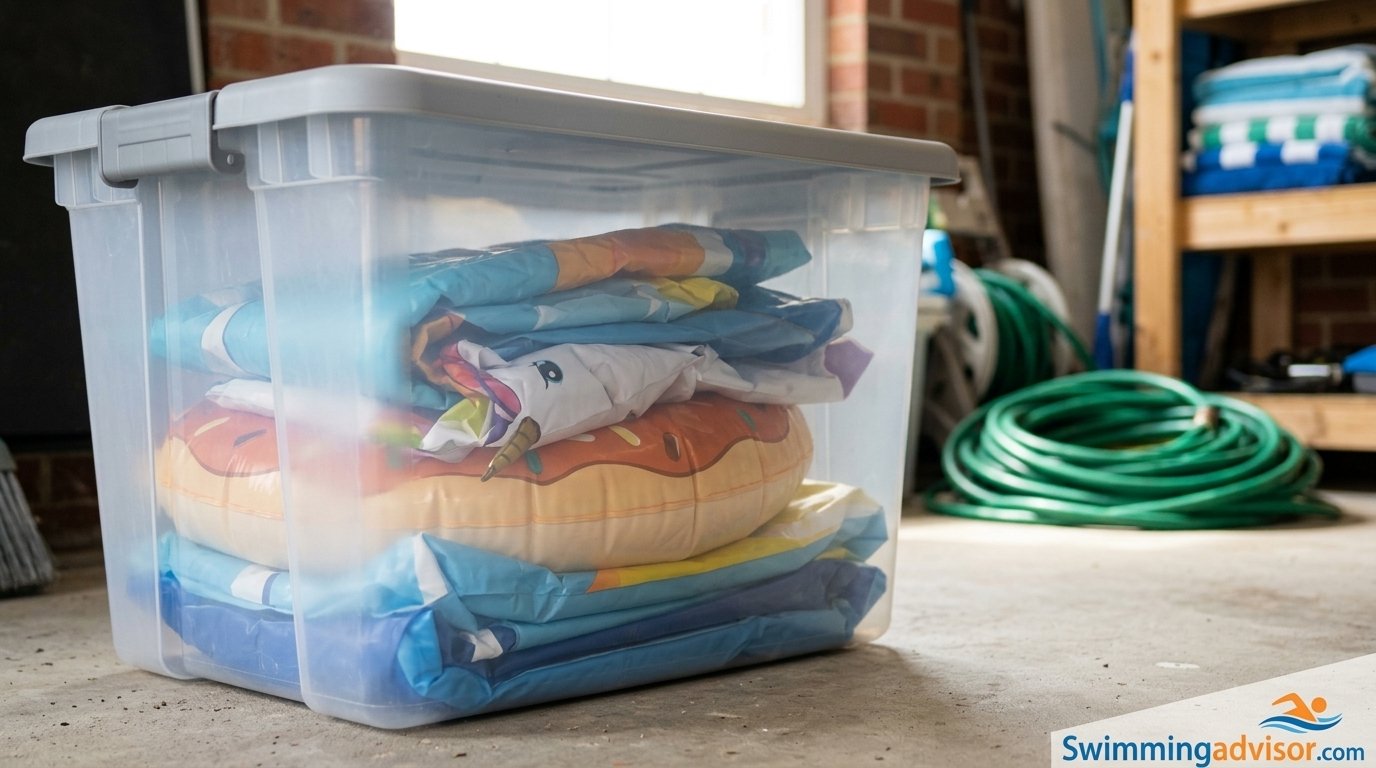
Why Proper Storage Matters
Pool floats look indestructible when they’re bobbing around under the summer sun, but the truth is that vinyl, PVC, and even foam are surprisingly fragile once they’re out of the water. UV rays break down plastic polymers, trapped moisture breeds mold in a matter of days, and careless folding creates stress points that eventually turn into slow leaks. Most pool floats don’t die from a single dramatic puncture — they die slowly, from a summer of being tossed in a hot garage, left half-inflated in direct sun, or crammed into a bin still damp from the last swim.
Storing your floats correctly isn’t just about tidiness. It directly affects how many seasons you get out of a single float, how much you spend replacing gear every year, and whether your inflatable pool setup stays smelling fresh instead of like a damp basement. A float that costs thirty or forty dollars can easily last three to five seasons with the right care — or it can crack and deflate by August if it’s stored wrong even once.
There’s also a safety angle. Mold and mildew that grow inside folded, damp vinyl aren’t just unsightly; they can trigger allergic reactions in sensitive swimmers, especially kids who tend to chew on float handles or headrests. A few extra minutes of prep before storage protects both your investment and your family’s health.
Think about what a float actually goes through in a single summer. It gets exposed to chlorinated or salt water, baked by direct sun for hours at a time, coated in sunscreen and body oils, occasionally dragged across a rough concrete pool deck, and then, more often than not, tossed into a garage corner or left half-inflated on the patio overnight. None of these things are individually catastrophic, but stacked together over a season they add up to a lot of wear. Proper storage is essentially damage control — it’s the buffer that keeps a season’s worth of normal wear from turning into permanent degradation.
There’s also a financial argument that’s easy to overlook. A family that regularly buys new floats every spring because last year’s collection cracked, deflated, or grew mold in storage is effectively paying a “poor storage tax” year after year. Multiply that across loungers, rings, noodles, and specialty floats for kids, and it adds up to a meaningful chunk of a household’s seasonal pool budget. Compare that to the cost of a breathable storage bag or a few ventilation holes drilled into a plastic bin, and the math clearly favors spending a little time on proper storage.
Finally, consider convenience. Nothing ruins the first hot weekend of the season faster than pulling out a float, inflating it, and discovering a slow leak, a cracked seam, or a smell so strong it needs to be aired out for two days before anyone will sit on it. Floats that are stored correctly are ready to use within minutes — rinse off any dust, inflate, and go. That kind of readiness is worth the modest effort it takes to store gear properly in the first place.
Before You Store: The Prep Checklist
Before you even think about where to put your floats for the off-season, run through this quick prep checklist. Skipping any one of these steps is the single most common reason floats show up covered in mildew stains the following spring.
- Rinse off chlorine, salt, and sunscreen residue — these chemicals accelerate vinyl degradation over time.
- Check for punctures or slow leaks — patch small holes now rather than discovering them mid-swim next year.
- Dry completely — inside and out, including handles, cup holders, and seams.
- Partially deflate — full deflation is ideal for long-term storage, but a partial deflation works for short breaks between swims.
- Fold loosely, not tightly — tight folds create permanent crease lines that eventually crack.
- Choose a stable, shaded storage spot — away from direct sunlight and temperature swings.
If you’re storing multiple floats at once — say, a couple of loungers, a set of kids’ floaties, and a giant unicorn raft — group them by size and material so you can apply the right technique to each. Rigid foam floats need different handling than inflatable vinyl ones, which we’ll cover separately later in this guide.
It also helps to do a quick material check before you start. Most modern floats are made from one of three materials: standard PVC vinyl, thicker “heavy-duty” vinyl often reinforced with nylon mesh, or closed-cell foam. Standard vinyl is the most common and the most sensitive to UV and folding stress. Heavy-duty vinyl is more forgiving but bulkier to store. Foam floats don’t need drying or deflating at all, but they’re more prone to permanent warping if stacked or bent for long periods. Knowing which category your float falls into helps you decide how much time to spend on each step below.
One more thing worth doing before storage season begins: take stock of what you actually have. Pool gear tends to multiply quietly over a few summers — an extra ring here, a birthday-gift raft there — and by the time fall rolls around, many households have more floats than they remember owning. A quick inventory, even just a mental one, helps you figure out how much storage space and how many bags or bins you’ll actually need, rather than improvising with whatever’s on hand and ending up with floats crammed too tightly together.
Step-by-Step Cleaning Process
Cleaning is the foundation of good float storage. Skipping it is how mildew spots and that unmistakable “stored pool gear” smell end up baked into your vinyl for good. Here’s the full six-step method professional pool supply shops recommend.
1Rinse With Fresh Water
Start by hosing down the float on both sides with plain fresh water. This removes chlorine, salt residue, sunscreen oil, sand, and pollen that cling to vinyl surfaces. Use a gentle spray setting — a high-pressure nozzle can stress seams on inflatable seams over time.
2Mix a Mild Soap Solution
Combine a few drops of dish soap with warm water in a bucket. Avoid harsh detergents, bleach, or alcohol-based cleaners — these strip the plasticizers that keep vinyl flexible, making it brittle and prone to cracking.
3Wipe Down With a Soft Cloth
Using a microfiber cloth or soft sponge, gently wipe every surface, paying special attention to seams, valve caps, handles, and any textured grip areas where sunscreen and algae tend to accumulate.
For stubborn mildew spots, a diluted white vinegar solution (one part vinegar to four parts water) works as a natural, vinyl-safe disinfectant. Let it sit for two to three minutes before wiping clean.
| Cleaner | Safe for Vinyl? | Best For |
|---|---|---|
| Mild dish soap + water | Yes | Everyday grime, sunscreen residue |
| Diluted white vinegar | Yes | Light mildew spots |
| Bleach | No | Not recommended — degrades vinyl |
| Alcohol-based cleaner | No | Not recommended — dries out plasticizers |
| Baking soda paste | Yes | Set-in stains, gentle scrubbing |
Pay extra attention to any textured or grippy sections, since these tend to trap grime more than smooth vinyl. Cup holders, backrests, and handle straps are notorious for collecting a film of sunscreen and skin oils that regular rinsing alone won’t fully remove. A soft-bristled brush — an old toothbrush works fine — is useful for getting into these tighter spots without scratching the surface.
If your float has any printed graphics or a laminated design layer, avoid scrubbing directly over the print with anything abrasive. Stick to soft cloths and gentle circular motions in those areas so the artwork doesn’t peel or fade prematurely. Cleaning doesn’t need to be aggressive to be effective — the goal is simply to remove residue before it has a chance to bond with the vinyl surface over a long storage period.
Drying Your Floats Completely
This is the step most people rush — and it’s the one that matters most. Any moisture sealed inside a folded float becomes a breeding ground for mold within 48 to 72 hours in warm conditions. Even floats that look dry on the outside often hold trapped water inside seams, cup holder wells, or headrest cushions.
4Air-Dry in a Shaded, Ventilated Spot
Lay the float flat or drape it over a railing in a shaded area with good airflow. Avoid direct sunlight for drying — UV exposure during this stage does more cumulative damage than almost anything else in the float’s lifecycle. Aim for at least 12 to 24 hours of drying time, flipping the float halfway through so both sides get equal airflow.
If you’re drying multiple floats after a pool party, stagger them so air can circulate between each one rather than stacking damp floats on top of each other. A box fan pointed at the drying area speeds things up considerably on humid days.
Don’t forget the inside. Many floats — especially loungers with mesh seats or rings with fabric-covered padding — hold moisture inside layers that aren’t obvious from the outside. Press gently along seams and padded sections; if you feel any give or dampness, extend the drying time. A float that feels dry to the touch on the surface can still be holding water in a hidden pocket, and that hidden moisture is exactly what causes the musty smell people notice weeks later when they unpack their storage bin.
In humid climates, consider a two-stage drying approach: an initial outdoor air-dry to remove the bulk of the surface water, followed by a few hours indoors near a fan or dehumidifier to finish the job. This is particularly useful for thicker heavy-duty floats and rafts with multiple layers, which naturally hold more residual moisture than a simple single-layer ring float.
Deflating Without Damaging Seams
Once your float is bone dry, it’s time to release the air. Deflating sounds simple, but doing it wrong can stress seams or push a valve out of alignment.
5Open the Valve and Roll From the Opposite End
Open the air valve fully, then start rolling or pressing air out from the end farthest from the valve, working toward it — similar to rolling toothpaste from the bottom of the tube. This pushes air out steadily instead of forcing it through one section, which reduces strain on internal seams.
For rigid inflatable rafts with multiple air chambers, deflate each chamber separately in sequence rather than all at once — this keeps the float balanced and prevents one section from bearing all the pressure as air shifts.
Do
- Deflate gradually, chamber by chamber
- Keep the valve fully open during rolling
- Leave a tiny bit of air for cushioning if storing short-term
Don’t
- Sit or jump on the float to force air out fast
- Deflate while the float is still wet
- Force the valve closed while air is still escaping
Grab a Dedicated Float Storage Bag
A breathable, weatherproof storage bag keeps floats protected from sun, dust, and moisture between seasons.
Check Price on AmazonFolding and Rolling Techniques
How you fold a float determines whether it develops permanent crease lines. Sharp, tight folds concentrate stress along a single line, and over months of storage that line becomes a weak point prone to cracking or leaking.
6Loose-Roll Instead of Sharp-Folding
Rather than folding the float into a small, tightly creased square, loosely roll it like a sleeping bag. Rolling distributes bend stress evenly across a curve instead of concentrating it at fold points. For larger loungers, fold in half once, then roll from one end to the other.
If the float has a rigid headrest, cup holder, or built-in backrest, roll around that feature rather than folding directly over it — folding hard plastic components in half can crack the fitting or the seam where it attaches to the vinyl.
For floats with multiple air chambers — common in larger loungers and rafts — try to roll in a direction that keeps each chamber’s seams as flat as possible rather than bunching seam lines into the crease of the roll. If you’re not sure which direction that is, lay the float flat first and look at how the internal baffle seams run; rolling parallel to those seams, rather than across them, generally produces a smoother, lower-stress roll.
It’s also worth rolling a little looser than feels necessary. A slightly bulkier roll that fits comfortably in its storage bag is far better for the float’s long-term condition than a tightly compressed roll that saves an inch of space but creates hard crease lines. If a float genuinely won’t fit in your intended storage container without an aggressive fold, it’s a sign you need a slightly larger bag or bin — not a sign to compress the float further.
Bagging and Bundling
Once rolled, place each float inside a breathable storage bag — mesh laundry bags, dedicated float totes, or even large pillowcases work well. Avoid airtight plastic bags for long-term storage; trapped humidity inside sealed plastic is one of the fastest ways to grow mold, even on a float that seemed completely dry when you packed it.
If you don’t have a dedicated float bag, a large under-bed storage bin with a few small ventilation holes drilled in the lid strikes a good balance between dust protection and airflow. Label each bag or bin by float type so you’re not unrolling five loungers next spring just to find the kids’ swim diapers and inflatable ring.
When bundling several smaller floats together — think arm floaties, small rings, and pool noodles in short segments — resist the urge to stuff them all into one tightly packed bag. Overpacking a bag defeats the purpose of choosing a breathable material in the first place, since airflow can’t reach the floats in the middle of a densely packed bundle. As a rule of thumb, a storage bag should be about seventy percent full at most, leaving room for air to circulate around each item.
If you’re storing floats in a shared family garage or shed, consider using color-coded bags or simple tags for each family member’s gear, especially if you have kids with several different floaties and rings. This isn’t just for organization — it also means nobody has to unroll and re-roll several floats just to find the right one before a spontaneous swim.
Best Storage Methods Compared
Not every household has the same storage space. Here’s how the most common storage methods stack up against each other so you can pick what fits your garage, shed, or closet.
| Method | Best For | Airflow | Space Needed | Protection Level |
|---|---|---|---|---|
| Breathable storage bag | Most inflatable floats | High | Low | Good |
| Ventilated storage bin | Multiple floats at once | Medium | Medium | Very Good |
| Hanging wall hooks | Foam noodles, rigid floats | High | Low (vertical) | Good |
| Overhead garage rack | Bulky rafts, large loungers | High | Low (uses ceiling space) | Very Good |
| Sealed airtight bag | Not recommended | None | Low | Poor (traps moisture) |
For most households, a combination works best: breathable bags for individual inflatable floats, and an overhead rack or wall hooks for bulkier items like rigid foam mats and pool noodles that don’t compress down as easily.
Budget also plays a role here. A ventilated storage bin typically costs more upfront than a simple mesh bag but pays off if you’re storing several floats together and want a container sturdy enough to stack other pool gear on top, like swim paddles or a pump. Wall-mounted hooks and overhead racks require a small amount of installation effort but free up floor space entirely, which matters a lot in smaller garages or apartment storage closets. There’s no single “best” method for every household — the right choice depends on how much space you have, how many floats you own, and how often you rotate gear in and out of storage during the season.
Whichever method you choose, try to keep it consistent. Constantly switching between different storage systems each season makes it harder to build good habits, and good habits — not perfect equipment — are what actually keep floats in good condition year after year.
Choosing the Right Storage Location
Even a perfectly cleaned, dried, and rolled float can degrade quickly if it’s stored in the wrong environment. Here’s what to look for and what to avoid when picking a spot.
Ideal Storage Conditions
- Consistent, moderate temperature (avoid extreme heat or freezing cold)
- Low humidity, dry air
- No direct sunlight or UV exposure
- Elevated off the ground, away from pests and moisture
- Good ventilation, even inside a closed bin or bag
Spots to Avoid
- Hot attics — summer attic temperatures can exceed 120°F, which softens vinyl and weakens seams over time.
- Unheated sheds in freezing climates — extreme cold makes vinyl brittle and prone to cracking when handled.
- Basements prone to flooding — obvious, but worth stating: any area with a history of water intrusion is a mold risk.
- Direct sun near a garage window — UV exposure continues even in storage if a float sits in a sunbeam for months.
A closet shelf, a dry basement corner on a raised shelf, or a garage cabinet away from windows are all solid choices for most homes.
Apartment dwellers and those without a garage or shed have fewer options, but storage is still very achievable. A hall closet, the back of a bedroom closet, or under-bed storage bins all work well, provided the float is fully dry before it goes in. Balcony storage boxes are tempting for space reasons but tend to expose floats to significant temperature swings and, depending on the balcony’s orientation, direct sun for part of the day — so if that’s your only option, prioritize a shaded corner and check on the float periodically throughout the off-season.
It’s also worth thinking about elevation. Storing floats directly on a concrete garage or basement floor exposes them to ground moisture, temperature extremes, and a higher chance of contact with pests. A simple wire shelving unit, even a basic one, raises floats off the floor and dramatically reduces these risks for very little cost.
Storing Heavy-Duty and Oversized Floats
Extra-large loungers, multi-person rafts, and floats designed for heavier adults tend to use thicker, more rigid vinyl and often have multiple independent air chambers. They deserve a slightly different approach:
- Deflate one chamber at a time to avoid uneven pressure buildup on remaining chambers.
- Never fold thick vinyl into a tight square — the material holds creases more stubbornly than thinner floats.
- Store flat or loosely rolled inside a large duffel-style bag rather than a small bin, since forcing a big float into a too-small container recreates the same crease problems you’re trying to avoid.
- Consider a dedicated shelf or overhead rack, since these floats are often too bulky for closet storage.
| Float Type | Recommended Fold | Storage Container |
|---|---|---|
| Standard lounger | Fold once, loose roll | Medium breathable bag |
| Heavy-duty/oversized lounger | Loose roll only, no folding | Large duffel bag or bin |
| Multi-person raft | Roll each chamber separately | Extra-large storage tote |
| Kids’ ring float | Simple loose coil | Small mesh bag |

Ventilated Storage Bins for Larger Floats
A sturdy, ventilated bin protects oversized loungers and rafts from dust while letting residual moisture escape.
Check Price on AmazonStoring Foam Noodles and Rigid Floats
Foam pool noodles, kickboards, and rigid EVA foam mats don’t deflate, so their storage challenge is different: it’s all about avoiding warping and permanent bending.
Hanging Storage for Noodles
The single best method for pool noodles is vertical hanging storage. A simple wall-mounted hook, a repurposed curtain rod, or even a length of PVC pipe mounted horizontally on a garage wall lets noodles hang straight without bending. Bent or coiled noodles that sit in storage for months often develop a permanent curve that never fully straightens out.
Rigid Mats and Kickboards
Store these flat, or stand them upright leaning against a wall rather than stacking heavy items on top of them. Stacking causes slow, permanent warping in EVA foam, especially in warm storage areas where the foam softens slightly.
Good Practices
- Hang noodles vertically on hooks or a rod
- Store rigid mats flat or upright, unstacked
- Keep foam away from direct heat sources
Avoid
- Coiling noodles tightly and leaving them for months
- Stacking heavy items on top of foam mats
- Storing foam near a furnace, heater, or hot pipe
Seasonal and Winter Storage Tips
Short-term, in-season storage between weekend swims is very different from long-term winter storage. Here’s how to adjust your approach depending on the season.
In-Season Storage (Between Swims)
- Rinse briefly and let air-dry in shade for a few hours.
- Partial deflation is fine — you don’t need to fully empty the float if you’ll use it again within a week.
- A simple hook, bin, or corner of the patio works, as long as it’s shaded.
End-of-Season / Winter Storage
- Full clean, full dry, and full deflation are all mandatory.
- Move floats indoors — an unheated garage is fine in mild climates, but avoid freezing temperatures if possible since cold makes vinyl brittle.
- Check the storage spot once mid-winter for any signs of pests or moisture intrusion.
- Before the first swim of the new season, inspect for cracks, sun damage, or valve issues before inflating fully — the same way you’d check swim gear batteries or straps after months in storage.
Common Mistakes to Avoid
| Mistake | Why It’s a Problem | Better Approach |
|---|---|---|
| Storing while still damp | Leads to mold and mildew within days | Air-dry fully for 12–24 hours first |
| Using airtight plastic bags | Traps humidity, accelerates mold growth | Use breathable mesh or ventilated bins |
| Sharp, tight folding | Creates permanent crease lines that crack | Loose-roll instead of folding tightly |
| Leaving floats in direct sun | UV breaks down vinyl even in storage | Choose a shaded, indoor spot |
| Stacking heavy items on foam floats | Causes permanent warping | Store foam flat or upright, unstacked |
| Ignoring small leaks before storage | Small leaks worsen over months | Patch punctures before packing away |
DIY Storage Solutions
You don’t need to buy expensive organizers to store floats well. A few budget-friendly DIY approaches work just as effectively:
- Repurposed garment bags — zippered garment bags with a bit of extra room make excellent breathable float covers.
- PVC pipe rack — a horizontal length of PVC pipe mounted on wall brackets gives noodles and pool toys a place to hang without bending.
- Over-the-door mesh organizer — great for smaller inflatable rings, arm floaties, and swim paddles that don’t need much space.
- Milk crates with cloth liners — stackable, ventilated, and free if you already have them lying around.
- Ceiling-mounted cargo net — commonly used in garages for sports equipment, works equally well for lightweight inflatable floats.
Whatever container or hook system you choose, the underlying principle stays the same: keep air moving, keep sunlight out, and avoid sharp compression points.
Another underrated DIY option is a simple clothing rack with wide, padded hangers. Loungers and larger rafts can be draped over the bar in a loose fold, similar to how you’d hang a heavy coat, which avoids sharp creases entirely while keeping the float visible and easy to grab. This works especially well in a mudroom, laundry room, or garage corner where floor space is limited but a bit of vertical clearance is available.
If you’re handy with basic tools, a shallow shelf built from scrap plywood, sized to hold a few rolled floats side by side, is another inexpensive option that keeps everything organized and off the ground. The goal with any DIY solution isn’t to build something elaborate — it’s simply to give each float a defined, breathable spot so it isn’t shoved into a random pile where damp items can touch dry ones and creases form under the weight of whatever’s stacked on top.
Ongoing Maintenance Between Swims
Good storage habits aren’t a once-a-year task — a little consistency across the season pays off. Here’s a simple maintenance rhythm to follow:
- After every swim: rinse briefly, wipe dry, and store in shade — even if you’re using the float again the next day.
- Weekly during peak season: check the valve seal and give the float a quick visual inspection for soft spots or slow leaks.
- Monthly: do a full soap-and-water clean, especially if the pool uses heavy chlorination or the float sees frequent use.
- Before storing away for the season: follow the full six-step process outlined earlier in this guide — clean, dry, deflate, roll, bag, and store in a stable location.
If you also rotate other gear through the same storage space — inflation pumps, patch kits, or spare valves — keeping everything together in one labeled bin means you’re not hunting for a pump every time you need to top off a float before a swim.
It also helps to build a simple end-of-season ritual around this maintenance rhythm rather than treating it as a chore to squeeze in whenever there’s time. Many households find it easiest to do the full clean-and-store routine on the same weekend every year — for example, the weekend after Labor Day in the U.S., or whenever the pool typically closes for the season locally. Having a set date removes the guesswork and prevents floats from sitting damp and forgotten in a corner for weeks before anyone gets around to properly storing them.
Keeping a small log — even just a note on your phone — of which floats had leaks, valve issues, or mold problems in past seasons can also help you catch recurring issues early. If the same float develops a slow leak two years in a row, for instance, it may simply be nearing the end of its usable life, and replacing it proactively is often cheaper than continuing to patch the same weak spot every summer.

Keep a Repair Kit On Hand
Patch small leaks the moment you spot them, before they turn into a full deflation next season.
Check Price on AmazonFrequently Asked Questions
Do I need to fully deflate a pool float every time I store it?
Not necessarily. For short breaks between swims — a few days to a week — partial deflation is fine as long as the float is dry and kept in shade. For end-of-season or long-term storage, full deflation is strongly recommended to reduce seam stress and save space.
How long does a pool float take to dry before storage?
Most floats need 12 to 24 hours of air-drying in a shaded, ventilated area. Thicker vinyl or floats with cushioned headrests may take a bit longer, especially in humid climates.
Can I store pool floats in a garage?
Yes, as long as the garage doesn’t reach extreme temperatures. A shaded corner of a moderate-temperature garage works well. Avoid spots near windows where direct sunlight hits for extended periods, and avoid unheated garages in climates with hard winter freezes.
Why does my pool float smell musty after storage?
A musty smell almost always means moisture was trapped during storage, allowing mold or mildew to develop inside folds or seams. Clean thoroughly with a diluted vinegar solution, dry completely in sunlight briefly (just for odor removal, not long-term drying), and store in a breathable bag going forward.
Is it okay to store pool floats in direct sunlight?
No. UV exposure is one of the fastest ways to degrade vinyl, causing it to become brittle, discolored, and prone to cracking. Always choose a shaded storage location, even for short-term storage.
What’s the best container for storing multiple pool floats?
A ventilated storage bin or a large breathable duffel bag works best for multiple floats. Avoid airtight sealed containers, which trap humidity and encourage mold growth even on floats that seemed dry when packed away.
How do I store a pool float over winter in a cold climate?
Bring it indoors if possible — a closet, insulated attic, or spare room works well. Extreme cold makes vinyl brittle and more likely to crack when folded or handled, so avoid unheated outdoor sheds in freezing regions.
Can pool noodles be stored the same way as inflatable floats?
Not exactly. Foam noodles don’t deflate, so the main concern is warping rather than moisture. Hanging them vertically on a hook or rod keeps them straight, while coiling and storing them for months can cause a permanent bend.
Will folding a pool float damage it permanently?
Tight, sharp folds can create crease lines that weaken the vinyl over time and eventually crack. Loose rolling, rather than folding into a tight square, distributes stress more evenly and helps the float keep its shape and integrity longer.
How often should I clean my pool float during the swim season?
A quick rinse after every use is ideal, with a more thorough soap-and-water clean about once a month, or more often if the pool is heavily chlorinated or the float sees daily use.
Can I use a vacuum-seal bag to save space when storing floats?
It’s not recommended. Vacuum-seal bags are airtight, and any residual moisture left inside gets trapped against the vinyl with no ventilation, which significantly increases the risk of mold. Breathable storage bags are a safer choice, even if they take up slightly more space.
What should I do if I find a small hole or leak before storing a float?
Patch it before storage rather than after. Leaving a small leak untreated over months of storage often lets it worsen due to temperature changes and handling. A basic vinyl repair kit takes just a few minutes to apply and can add years to a float’s usable life.
Conclusion: A Few Extra Minutes Now Saves Your Floats for Years
Storing pool floats correctly really comes down to three habits: get them completely dry, keep them out of direct sunlight, and avoid tight, sharp folds that stress the vinyl. Whether you’re packing away a single inflatable ring after a pool party or organizing a whole garage shelf of loungers, noodles, and rafts for the winter, the same core principles apply across every float type.
Put in the extra ten minutes at the end of each swim season, and you’ll open that storage bin next spring to floats that are clean, crack-free, and ready to inflate on the first warm day — instead of a moldy, brittle mess that needs replacing before the season even starts.
Shop Pool Float Storage Bags on Amazon