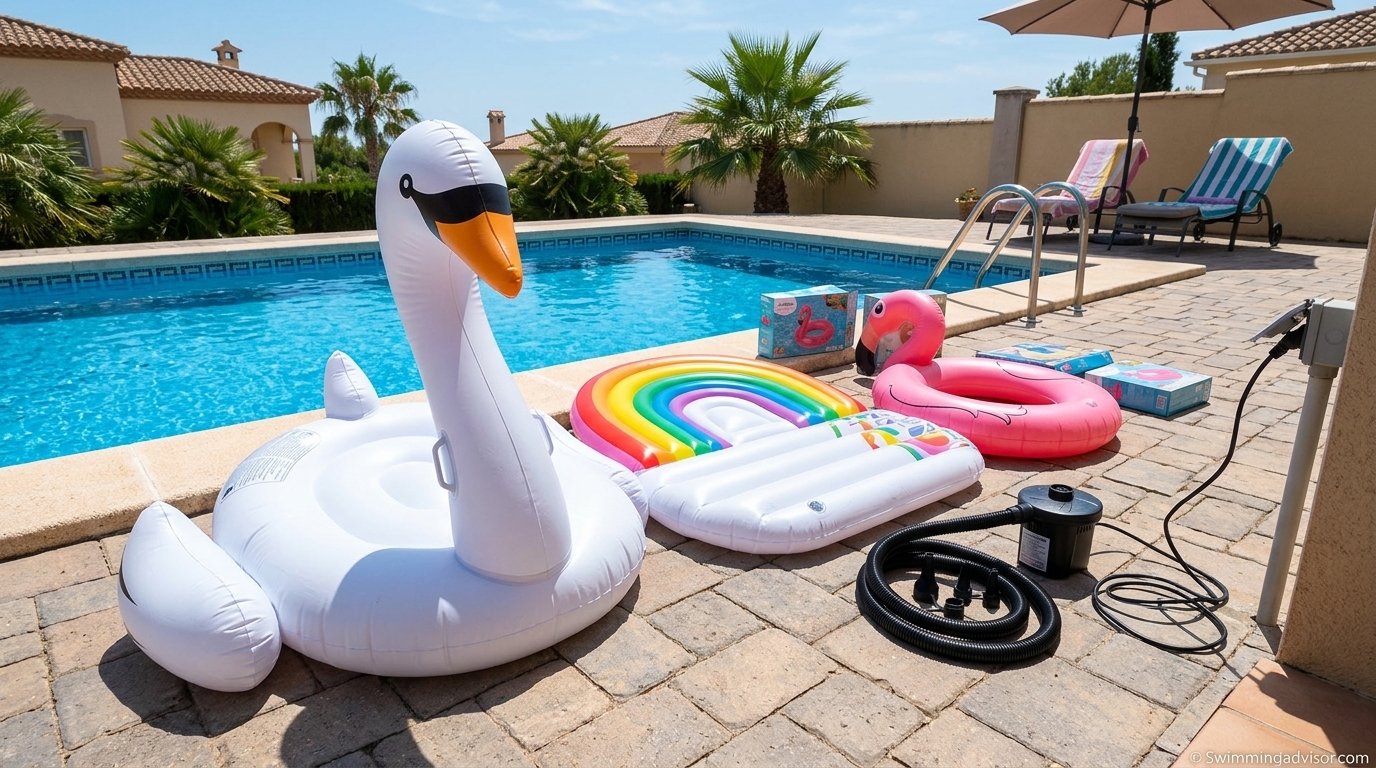
How to Blow Up Pool Floats: The Complete Step-by-Step Guide
From mouth inflation to electric pumps — learn the fastest, safest, and most reliable ways to get every float, lounger, and inflatable ring pool-ready in minutes.
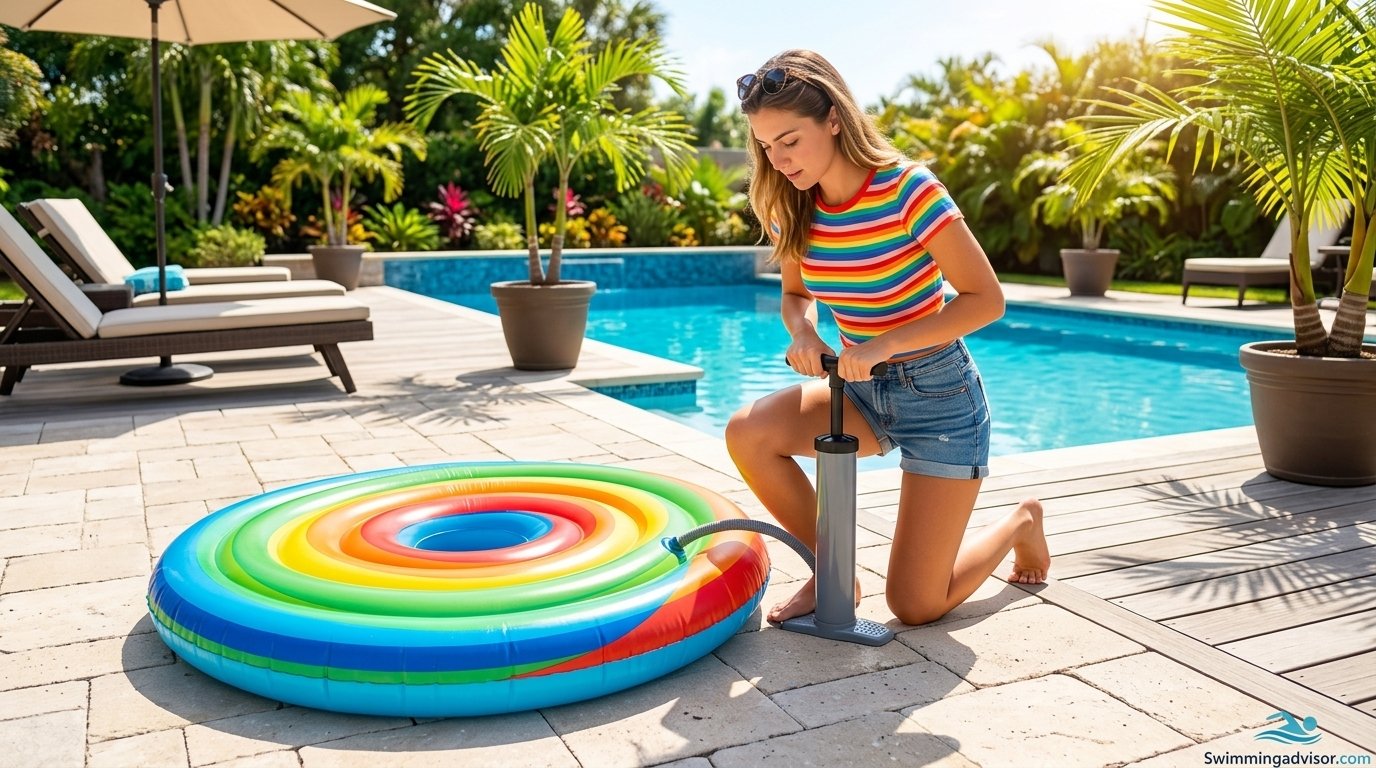
Why Proper Inflation Matters
Blowing up a pool float sounds like the simplest job in the world — until you’re standing poolside, red-faced, out of breath, and the float is still floppy. Getting it right isn’t just about saving your lungs. The way you inflate a float directly affects how long it lasts, how comfortable it is to lounge on, and how safely it holds up a kid, an adult, or a cooler full of drinks.
Under-inflated floats sag in the middle, dip under body weight, and wear out the seams faster because the fabric flexes more than it should. Over-inflated floats are stiff, prone to bursting in direct sun, and uncomfortable to lie on because the surface won’t give at all. There’s a sweet spot, and hitting it depends on both the inflation method you use and a bit of technique.
This guide walks through every practical way to blow up a pool float — from the classic lung-powered approach to hand pumps, foot pumps, and electric inflators — along with the prep work, common mistakes, and troubleshooting tips that make the difference between a float that lasts one summer and one that lasts five.
It also matters more than most people expect for the pool party itself. Nothing slows down a gathering faster than one guest standing off to the side, cheeks puffed out, working through a giant swan float while everyone else is already in the water. Having a plan — and the right tool for the job — means floats are ready before the first person even changes into a swimsuit.
There’s also a cost angle worth mentioning. A decent inflatable float, especially a larger lounger or novelty shape, isn’t cheap, and repeated mishandling during inflation is one of the leading reasons floats fail early. Seams that are stressed by uneven filling, valves that are forced with the wrong nozzle, and material that’s overfilled and left baking in the sun all shorten a float’s working life dramatically. Treating inflation as a five-minute chore rather than a two-minute rush pays for itself in how many summers a float survives.
What You’ll Need
Most pool floats can be inflated with nothing more than your own lungs, but having the right gear on hand makes the job dramatically faster and easier on your body. Here’s what’s worth having nearby before you start, roughly in order of how often most pool owners actually reach for each item over a season.
| Item | Purpose | Best For |
|---|---|---|
| Manual hand pump | Compresses air with a squeeze or push action | Small to medium floats, backup option |
| Foot pump | Larger air volume per stroke, hands-free operation | Loungers, large rings, multi-chamber floats |
| Electric air pump (corded or battery) | Automated inflation with adjustable pressure | Large floats, multiple floats in one session, giant/party-sized inflatables |
| Valve adapter nozzles | Match pump nozzle size to float valve | Any pump-based inflation |
| Valve cap or plug | Seals the valve after inflation | All float types |
| Soft cloth or towel | Wipes debris from valves before inflating | All float types |
If you only own one piece of equipment, a small battery-powered pump is the best all-around investment. It handles almost every valve type with the included nozzle set, inflates a standard lounger in under two minutes, and takes the physical strain out of larger inflatables entirely.
Optional Extras Worth Having
A few smaller items round out a proper float-inflation kit without adding much bulk. A vinyl repair patch kit costs very little and can rescue a float with a slow leak that would otherwise get thrown out. A small tire-pressure-style firmness gauge, while not strictly necessary, helps if you tend to over- or under-inflate by feel. And if you’re setting up for a pool party with several floats to fill, a pump with a long cord or a fully charged battery pack saves you from having to run back and forth to an outlet.
It’s also worth checking whether your float came with its own dedicated nozzle or adapter in the box. Many premium loungers and novelty shapes include a valve insert specifically sized for that model, and using it instead of a generic pump nozzle usually gives the tightest seal.

Recommended: A compact rechargeable electric pump with multiple nozzle attachments handles almost any float valve and cuts inflation time to under two minutes.
Check Price on AmazonBefore You Start Inflating
A few minutes of prep before you start pumping air prevents most of the problems people run into halfway through — sudden resistance, air escaping as fast as it goes in, or a valve that won’t seal properly once you’re done.
Unfold the Float Completely
Lay the float out flat on grass, a towel, or a soft patio surface, and unfold every panel before you introduce any air. If a float is inflated while still partially folded, the internal seams can be stressed unevenly, which shortens the life of the material and sometimes traps a fold permanently in the seam.
Locate and Inspect the Valve
Most pool floats use one of three common valve styles: a boston valve (a two-stage valve with an inner pin and outer cap, common on larger loungers), a one-way push valve (a simple spring-loaded flap), or a screw-cap valve (a plain twist-off cap over an open hole). Check which type you have, since it determines whether you can use a pump nozzle directly or need an adapter.
Check for a Clean, Dry Valve
Wipe any sand, dust, or moisture out of the valve opening with a dry cloth. Debris inside the valve is one of the most common reasons floats leak air immediately after inflation — the flap or pin can’t seat properly if there’s grit in the way.
Do a Quick Once-Over for Damage
Before adding any air, run your hand over the float’s surface and seams while it’s still flat, feeling for small tears, thin patches, or stiff, brittle spots that might crack under pressure. It’s much easier to spot and mark a small flaw on a deflated float than to chase down where air is escaping after it’s already full.
Pick a Sensible Location
Inflate on a flat, debris-free surface away from sharp gravel, thorny plants, or a freshly mowed lawn full of clippings that can stick to the adhesive backing on patch repairs later. Grass is generally kinder to the material than concrete, since concrete can scuff the coating on the underside as the float shifts around while filling.
Warm the Float Slightly if It’s Been in Cold Storage
Vinyl and PVC stiffen in cold temperatures, which makes early-season floats harder to unfold fully and more prone to small cracks at fold lines if forced open too aggressively. If a float has been in a cold garage or shed over winter, let it sit in a warm room for twenty to thirty minutes before unfolding and inflating.
Method 1: Manual Mouth Inflation
Blowing up a float by mouth is the oldest method and still the most common for small inflatables like inner tubes, arm floaties, and small rings. It costs nothing and needs no equipment, but it’s the slowest method and the least practical for anything larger than a single-person ring.
This method works because a valve is designed to let air in one direction and then close itself off, so you’re really just supplying the air pressure and letting the valve’s own mechanism do the sealing. The technique below focuses on getting the most air in per breath while protecting the seal so nothing leaks back out between breaths.
1Open the Valve Fully
Pull back the valve’s inner flap or pin so the airway is completely open. If the valve has two stages (an inner and outer seal), only open the inner one for now — the outer cap stays off until you’re finished inflating.
2Seal Your Lips Around the Valve
Position your mouth fully over the valve opening so no air escapes around the edges. A tight seal matters more than how hard you blow — a loose seal wastes most of your effort as air leaks back out past your lips.
3Blow in Steady, Controlled Breaths
Use slow, deep breaths rather than short, sharp puffs. Long breaths push more air per exhale and reduce the number of breaks you need between breaths to avoid getting light-headed. Pause and rest for 15–20 seconds every six or seven breaths.
4Seal the Valve Immediately After the Last Breath
The moment you stop blowing, press the inner flap closed with your finger or thumb before pulling away, then snap the outer cap into place. Any delay lets a surprising amount of air escape back out, undoing several breaths’ worth of effort.
Pros
- No equipment needed
- Works anywhere, anytime
- Ideal for small floaties and rings
Cons
- Physically tiring for larger floats
- Slower than any pump
- Risk of light-headedness with sustained blowing
Method 2: Hand or Foot Pump
A manual pump strikes a solid middle ground between effort and speed. Hand pumps are compact and cheap; foot pumps move more air per stroke and free up your hands to hold the float steady. Either works well for medium-sized loungers, tubes, and rings.
Both pump styles work on the same basic principle: a piston or bellows compresses air on the downstroke and pushes it through a one-way valve into the hose, then draws in fresh air on the upstroke to repeat the cycle. Dual-action pumps push air on both the downstroke and the upstroke, which roughly doubles the airflow per motion and cuts inflation time noticeably compared to single-action models.
1Attach the Correct Nozzle
Most pump kits include two or three nozzle sizes. Match the nozzle diameter to the float’s valve opening — a nozzle that’s too small will leak air around the seal, while one that’s too large simply won’t insert.
2Insert the Nozzle and Hold It Firm
Push the nozzle into the valve until you feel it seat snugly, then hold it in place with one hand throughout pumping. A nozzle that slips halfway out mid-pump loses most of the air you just pushed in.
3Pump in Steady, Even Strokes
Squeeze a hand pump or press a foot pump with a consistent rhythm rather than fast, hard bursts. Steady strokes let air move through the valve efficiently and reduce strain on the pump’s seals and your own joints.
4Stop at Firm-but-Slightly-Soft and Cap the Valve
Pull the nozzle out quickly once the float feels firm but still gives slightly under a squeeze, then close the valve within a second or two. Immediately press the cap or flap shut to lock the air in before it escapes back through the open valve.
Pros
- Much faster than mouth inflation
- Inexpensive and portable
- No batteries or power outlet needed
Cons
- Still requires physical effort
- Slower than electric pumps for large loungers
- Nozzle fit can be inconsistent across brands
Method 3: Electric Air Pump
For anything larger than a standard tube — party islands, double loungers, multi-chamber rafts — an electric pump is worth every penny. Battery-powered models are the most convenient since they don’t tie you to an outlet near the pool.
Most electric pumps use a small internal fan or impeller rather than a piston, which is why they move so much more air per second than any manual pump. Some models also include a deflate setting that reverses airflow, which is genuinely useful once the season ends and you need to pack floats away quickly for storage. If a pump offers adjustable pressure settings, a medium setting is usually the safest starting point — you can always finish with a few seconds on high if the float still feels soft.
1Select the Matching Nozzle Attachment
Electric pumps typically ship with three or four cone-shaped nozzles of different diameters. Test-fit the closest match to your float’s valve before switching the pump on, since swapping nozzles mid-inflation with the motor running is awkward and occasionally dangerous.
2Insert the Nozzle and Power On
Seat the nozzle fully into the valve, hold the float steady with your free hand or a knee, and switch the pump to the inflate setting. Most models push air far faster than any manual method, so stay close and watch the float rather than walking away.
3Monitor Firmness and Shut Off in Time
Watch the float’s surface as it fills — seams should smooth out and the shape should hold without wrinkles. Power off the pump slightly before it looks fully rigid, since electric pumps can overfill a float in seconds if left running unattended.
Pros
- Fastest inflation method by far
- Little to no physical effort
- Best for large or multi-chamber floats
Cons
- Requires charging or a power source
- Easy to overfill without watching closely
- Added cost compared to a manual pump
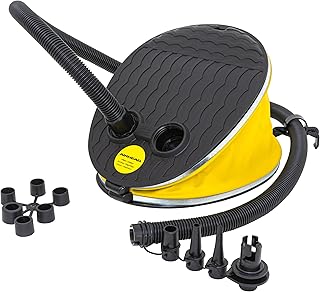
A dual-action foot pump is a great budget backup for anyone who wants faster inflation without buying batteries or finding an outlet.
Check Price on AmazonComparing the Three Methods
There’s no single “best” way to inflate a float — the right method depends on the float’s size, how many you’re filling, and how much effort you want to put in. Here’s how the three approaches stack up side by side.
| Method | Speed | Effort | Best For | Cost |
|---|---|---|---|---|
| Mouth Inflation | Slowest | High (lungs) | Small rings, arm floaties | Free |
| Hand/Foot Pump | Moderate | Medium (arms/legs) | Medium loungers, tubes | Low |
| Electric Pump | Fastest | Minimal | Large loungers, party floats, multiples | Moderate |
How Much Air Is Enough?
Getting the firmness right is arguably more important than which method you use to get there. A float that’s under-filled sags and folds under weight, while one that’s over-filled becomes rigid, uncomfortable, and more likely to burst a seam in strong sun. Most people default to filling until the pump feels hard to push or the electric motor sounds strained, but that’s really a sign you’ve already gone slightly too far rather than a useful stopping point.
The Squeeze Test
Press your thumb into the float’s surface. It should dent slightly and spring right back — roughly like a firm bicycle tire rather than a rock-hard basketball. If your thumb sinks in more than about half an inch, add a bit more air.
Leave Room for Heat Expansion
Air expands as it warms, and a pool float left in direct sun can heat up considerably within an hour. Inflate to about 90% capacity rather than bursting-point full, especially if the float will sit in full sun before anyone gets in the water.
| Float Type | Recommended Firmness | Notes |
|---|---|---|
| Small ring / tube | Firm, slight give | Fill fully; small volume means less heat-expansion risk |
| Lounger / mat | 90% firm | Leave slight softness for comfort and heat expansion |
| Multi-chamber raft | Even firmness across chambers | Under-filling one chamber unbalances the whole float |
| Giant/party float | 90–95% firm | Large surface area means more sun exposure and expansion |
Why Manufacturers Rarely List an Exact PSI
Unlike car tires or sports balls, most consumer pool floats don’t come with a printed pressure spec, mainly because the material and construction vary so much between a thin novelty float and a heavy-duty vinyl lounger. That’s why the squeeze test and visual cues — smooth seams, no wrinkles, a slight give under a thumb — are the practical standard rather than a specific number most shoppers could check anyway.
Temperature and Altitude Can Both Play a Role
Floats inflated in cool morning air and used later in the afternoon heat will firm up further on their own as the trapped air warms, which is part of why leaving some headroom matters. At higher elevations, lower ambient air pressure means a float can also feel slightly firmer than the same fill level would at sea level, though this effect is usually too small to worry about for typical backyard or vacation use.
Common Mistakes to Avoid
Most float problems trace back to a handful of avoidable habits. Watching for these will save you both frustration and replacement costs.
Inflating While Still Folded or Rolled
Air introduced into a folded float stresses the seams unevenly and can leave permanent crease lines. Always unfold completely first, even if it takes an extra minute.
Overfilling in Direct Sunlight
A float pumped to maximum firmness and then left on a hot pool deck can pop as the trapped air heats and expands. Fill slightly under full capacity whenever the float will sit in the sun before use.
Ignoring Valve Debris
Sand or grit lodged in the valve prevents a clean seal, leading to slow leaks that show up as a suspiciously soft float the next morning. Wipe the valve before every inflation.
Using the Wrong Nozzle Size
Forcing a mismatched nozzle into a valve can tear the rubber seal around the opening, creating a permanent leak point that no amount of re-inflating will fix.
Skipping the Cap
Even a float that seems perfectly sealed by the spring-loaded flap alone will lose air faster without the outer cap in place. Always snap the cap shut as the final step.
Rushing the Last Ten Percent
Many people stop pumping the moment a float looks roughly full, but that last bit of firmness is what actually holds someone’s weight without the float folding around them. Take the extra thirty seconds to bring it up to the recommended firmness rather than eyeballing “close enough.”
Leaving Floats Inflated in a Hot Car or Trunk
Transporting an already-inflated float in a hot car for a long drive is a common way people discover a burst seam right when they arrive at the pool. If you’re driving any real distance, deflate slightly or wait to inflate until you arrive.
Safety Tips
Inflatable pool floats are recreational items, not certified flotation devices, and a few safety habits go a long way toward a worry-free pool day.
- Never treat a pool float as a substitute for a life jacket, especially for young or non-swimming children.
- Keep floats away from pool drains, filters, and skimmers where fabric could get pulled in.
- Check for punctures or worn seams before every use, particularly early in the season after winter storage.
- Avoid inflating floats near open flames, hot grills, or fire pits — the material and the air pump’s motor can both be sensitive to heat.
- Supervise children closely any time they’re using an inflated float in or near water, regardless of how sturdy the float feels.
Watch for Wind on Open Water
Lightweight floats catch wind easily, and a lounger or raft can drift surprisingly fast across a large pool or out from shore on a lake. If you’re using floats somewhere without clear edges to grab, keep an eye on drift distance and consider a tether line for younger riders.
Mind Your Own Effort When Blowing Up Larger Floats
Mouth-inflating anything bigger than a small ring can genuinely leave you light-headed if you push through fatigue instead of resting between breaths. If you notice dizziness, stop, sit down for a minute, and switch to a pump for the rest of the job rather than pushing through.
Keep Electric Pump Cords Away from Water
If you’re using a corded electric pump near a pool deck, route the cord well away from wet surfaces and standing water, and avoid plugging in with wet hands. Battery-powered pumps sidestep this concern entirely, which is one more reason they’re popular for poolside use.
Retire Floats That Show Sun Damage
Prolonged UV exposure gradually breaks down vinyl and PVC, leaving the surface stiff, faded, or slightly chalky to the touch. A float in this condition is far more likely to split under normal use than to fail gracefully, so it’s worth retiring floats showing clear signs of sun degradation rather than continuing to inflate them to full pressure.
Troubleshooting Leaks and Stuck Valves
Even a well-maintained float will occasionally act up. Here’s how to handle the most common issues, roughly in order from the most frequent to the least common.
The Float Loses Air Overnight
A slow overnight deflation almost always points to either a valve that isn’t fully seated or a pinhole leak somewhere on the surface. Submerge the inflated float in a bathtub or shallow pool section and watch for a stream of bubbles to pinpoint the exact spot.
The Valve Won’t Stay Closed
If the inner flap keeps popping back open, check for a bent or worn pin — this is common after a season or two of use. A dab of food-safe silicone grease on the flap’s rubber edge can restore the seal on some valve designs.
Air Goes In But the Float Doesn’t Firm Up
This usually means air is escaping as fast as it’s added, most often from a seam separation rather than the valve. Look closely along glued seams for small gaps, which can sometimes be sealed with a vinyl repair patch.
The Pump Nozzle Won’t Fit
Try each nozzle size included with your pump before assuming incompatibility — many valve types accept a nozzle one size down if inserted at a slight angle and held firmly. As a last resort, a universal adapter cone sold separately fits almost any standard float valve.
The Valve Cap Is Missing or Broken
A lost or cracked valve cap is one of the most common small annoyances with older floats, and it’s rarely worth writing off an otherwise-good float over. Universal replacement valve caps are sold cheaply in multi-packs and work across most standard boston and push-valve designs — keep one in your pool bag as a backup so a missing cap doesn’t sideline a float mid-summer.
The Float Develops a Bulge or Uneven Shape
An oddly bulging section usually means an internal seam or baffle inside a multi-chamber float has partially separated, letting air pool unevenly in one area. This is harder to repair than a surface leak and, on lower-cost floats, is often a sign it’s nearing the end of its useful life. On higher-quality loungers with a manufacturer warranty, it’s worth checking whether the issue is covered before attempting a DIY fix.
A Brand-New Float Won’t Hold Air at All
Occasionally a float arrives with a manufacturing defect rather than damage from use — a valve that was never seated correctly during assembly, or a seam that wasn’t fully sealed. If a new-out-of-the-box float won’t hold air after a careful inflation attempt and valve check, it’s usually faster and more reliable to contact the seller for a replacement than to chase a factory defect with patches, especially while it’s still within a return window.
Repeated Leaks in the Same Spot
If a patch keeps failing in the same location, the surrounding material may be too worn or stretched for the adhesive to hold a lasting bond. In that case, a larger overlapping patch that extends well past the damaged area on all sides usually outperforms a small patch sized to match the hole exactly.
| Symptom | Likely Cause | Fix |
|---|---|---|
| Slow overnight deflation | Valve not fully seated or pinhole leak | Submerge and locate bubbles, then patch or reseat valve |
| Valve won’t stay shut | Worn or bent inner flap | Clean, lubricate, or replace valve insert if available |
| Won’t firm up despite pumping | Seam separation | Apply vinyl repair patch along the seam |
| Nozzle doesn’t fit valve | Mismatched size | Try alternate nozzle sizes or a universal adapter |
Choosing the Right Float
Inflation technique matters, but starting with a well-made float in the first place makes every step in this guide easier. Thicker PVC or vinyl holds air more reliably, welded seams outlast glued ones, and a well-designed valve seals more consistently over repeated use.
If you’re still shopping, our guide to the best floaties breaks down top picks by float type, and our roundup of the best pool floats for heavy adults highlights models built with reinforced seams and higher weight capacities for anyone who wants extra durability.
If you’re setting up an inflatable pool for the season alongside your floats, our guide to the best inflatable swimming pools covers sizing and setup considerations that apply to bigger inflatables in general, many of which share the same valve types and inflation logic covered in this guide. And if young swimmers will be joining in, it’s worth pairing floats with proper gear — our picks for the best swim diapers are a useful companion resource for anyone prepping a pool day with little ones.
Material Thickness Matters More Than It Looks
Two floats can look nearly identical online and still behave very differently once inflated, largely because of vinyl or PVC gauge — essentially how thick the material layer is. Thicker gauge material resists punctures better, holds its shape longer under body weight, and generally tolerates more aggressive pump pressure without stress marks appearing along the seams. If a product listing mentions gauge thickness or a specific “heavy-duty” or “commercial-grade” designation, that’s usually a reliable signal of a float built to last more than one season.
Welded Versus Glued Seams
Heat-welded seams fuse the material together directly and tend to outlast glued seams, which rely on an adhesive bond that can weaken over time, especially with repeated sun exposure and folding for storage. It’s not always obvious from a product photo which construction method a float uses, so checking reviews or product descriptions for seam type is worth the extra few minutes before buying, particularly for anything you plan to use season after season rather than treat as disposable.
Cleaning and Storing After Use
How you treat a float after its air goes back out matters just as much as how carefully you inflated it. Rinsing off sunscreen, chlorine, and pool debris before deflating prevents grime from settling into folded creases, and storing it properly keeps the vinyl flexible instead of brittle.
For a full rinse-and-dry routine, see our guide on how to clean pool floats. Once it’s clean and completely dry, our guide to how to store pool floats covers folding techniques and storage conditions that help floats survive the off-season without cracking or mildewing.
Deflating the Right Way
Open the main valve fully and press gently from the far end toward the valve to push air out in a controlled way, rather than just leaving it to leak out slowly on its own. For multi-chamber floats, deflate each chamber individually in reverse of the order you filled them. If your pump has a deflate setting, it can pull the last bit of air out faster than manual pressing alone, which also helps the float fold flatter for storage.
Let It Dry Completely Before Folding
Trapped moisture inside a folded, stored float is one of the most common causes of mildew smell and surface staining that shows up the following season. Leave the float open and mostly deflated in a shaded, ventilated spot until it’s fully dry inside and out, not just dry to the touch on the surface, before folding it away.

A dedicated storage bag keeps deflated floats clean and protected between uses, away from sharp objects that could puncture them in storage.
Check Price on AmazonHow Different Float Types Change the Inflation Process
Not every inflatable is built the same way, and a technique that works perfectly on a simple ring can be the wrong approach for a structured lounger or a novelty shape with awkward extremities.
Simple Rings and Tubes
These are the easiest floats to inflate by any method, since they’re a single air chamber with a single valve and no rigid internal structure to worry about. Mouth inflation is genuinely practical here, and even a small hand pump finishes the job in under a minute.
Loungers and Chaise-Style Floats
Loungers usually have two or three separate chambers — a seat section, a backrest, and sometimes a footrest or armrests — each with its own valve. Under-filling one section relative to the others creates an uneven, wobbly seat, so it’s worth checking firmness on each chamber individually rather than assuming one fill level covers the whole float.
Novelty Shapes (Flamingos, Unicorns, Swans, and Similar)
Long necks, tails, and other extremities on novelty floats often have their own mini air chambers or narrow sections that are easy to under-fill because they’re harder to reach with a straight pump nozzle. Take your time working air into these thinner sections, and check them by hand once the main body is done, since a sagging neck or head is one of the most common complaints with this float style.
Multi-Person Rafts and Party Islands
The largest floats on the market, these can have four or more independent chambers plus separate structures like built-in cup holders or backrests that inflate on their own valve. Filling order matters here more than anywhere else — an unevenly inflated party island can genuinely tip or feel unstable with several people aboard, so follow the manufacturer’s fill sequence printed on the float or included instructions closely.
| Float Type | Typical Valve Count | Recommended Method |
|---|---|---|
| Ring or tube | 1 | Mouth or hand pump |
| Standard lounger | 2–3 | Hand pump or electric pump |
| Novelty shape | 1–3 | Hand pump, check extremities by hand |
| Multi-person raft/island | 4+ | Electric pump, follow fill order |
Inflating Multiple Floats for a Pool Party
If you’re prepping five or six floats ahead of a get-together, doing them one at a time with a hand pump adds up fast. A little batching makes the whole process smoother.
Start by unfolding and laying out every float in the group first, so you’re not stopping mid-inflation to go find and unroll the next one. If you’re using an electric pump, work through the largest floats first while the battery is fully charged, since inflation draws down battery life and you don’t want to run out of charge on the biggest lounger of the group. Keep the valve caps for each float nearby and organized — it’s surprisingly easy to misplace a small plastic cap in the grass, and a missing cap means a slow leak all party long.
For a recurring pool-party setup, it’s also worth keeping a couple of spare floats in reserve. Between kids landing on them, dogs with enthusiastic paws, and general wear, having a backup ring or two on hand means one punctured float doesn’t end the fun for whoever was using it.
Frequently Asked Questions
How long does it take to blow up a pool float?
Mouth inflation on a small float takes two to five minutes. A hand or foot pump typically finishes a medium float in one to three minutes. An electric pump handles most loungers in well under two minutes, sometimes closer to thirty seconds for smaller items.
Can I use a bike pump to inflate a pool float?
Some bike pumps work with an adapter nozzle, but standard bike valve fittings (Presta or Schrader) rarely match float valves directly. A dedicated pump with interchangeable cone nozzles is a more reliable choice.
Why does my pool float deflate overnight even though there’s no visible hole?
The most common cause is a valve that isn’t fully seated, followed by a slow pinhole leak too small to see without submerging the float in water and watching for bubbles.
Is it bad to over-inflate a pool float?
Yes. Overfilling stretches the seams and increases the risk of a burst, especially once the float sits in direct sun and the trapped air heats and expands.
What’s the best pump for large pool floats?
A battery-powered electric pump with multiple nozzle sizes is generally the fastest and least tiring option for loungers, rafts, and party-sized inflatables.
Can a leaf blower inflate a pool float?
Some people use a leaf blower’s low setting for very large floats since it moves a high volume of air quickly, but it lacks precise control and can overfill a float in seconds if you’re not careful.
How do I know which valve type my float has?
Look closely at the opening: a two-stage flap with a separate outer cap is a boston valve, a simple spring flap alone is a push valve, and a plain screw-off cap over an open hole is a screw-cap valve.
Should I inflate all chambers on a multi-chamber float at once?
No — inflate one chamber at a time, generally starting with the base or bottom chamber, and check the float’s tag for any manufacturer-specified order.
Why does my pump nozzle keep slipping out of the valve?
This usually means the nozzle is a size too small for the valve opening. Try the next size up in your pump’s nozzle set, or hold the nozzle in place firmly with one hand while pumping with the other.
Can I fix a small leak myself instead of replacing the float?
In most cases, yes. A vinyl repair patch applied to a clean, dry, deflated surface over the leak point works well for pinhole leaks and small seam separations.
Is it safe to leave a fully inflated float in the sun all day?
It’s safer to inflate to around 90% capacity if the float will sit in full sun for hours, since the trapped air expands with heat and a fully-maxed float has less room to expand safely.
Do all pool floats use the same size valve?
No. Valve sizes vary by brand and float type, which is why most pumps come with two or three interchangeable nozzle sizes rather than a single fixed nozzle.
Why does my float feel firm at home but soft once it’s in the pool?
Cool pool water can slightly lower the air pressure inside a float compared to how it felt on a warm patio, since gases contract as they cool. This is usually minor and not a sign of a leak, though it’s worth topping off with a few extra pumps if the float feels noticeably softer.
Can I inflate a pool float indoors?
Yes, mouth and manual pump inflation work fine indoors. Electric pumps are also safe indoors, though their motors can be fairly loud, so it’s usually more pleasant to inflate large floats outside or in a garage.
How often should I check a float for leaks during the season?
A quick firmness check before each use is enough for casual use, but if a float sees heavy weekly use, it’s worth doing a more thorough soap-and-water bubble test once a month to catch slow leaks before they become obvious.
Final Thoughts
Blowing up a pool float doesn’t need to be a workout or a guessing game once you know which method fits the job and how to spot the small details — a clean valve, the right nozzle, firm-but-not-rigid pressure — that make the difference between a float that lasts one afternoon and one that lasts all summer. Whether you stick with mouth inflation for a small ring or invest in an electric pump for the big loungers, the steps above will get every float pool-ready quickly and safely.
Keep this guide bookmarked for the start of every pool season, especially if floats have spent the winter in storage — a quick valve check, a careful unfold, and the right inflation method will have your whole float collection back in the water in less time than it takes to set up the rest of the pool.
Shop Pool Float Pumps on Amazon